Saturday, March 30, 2013

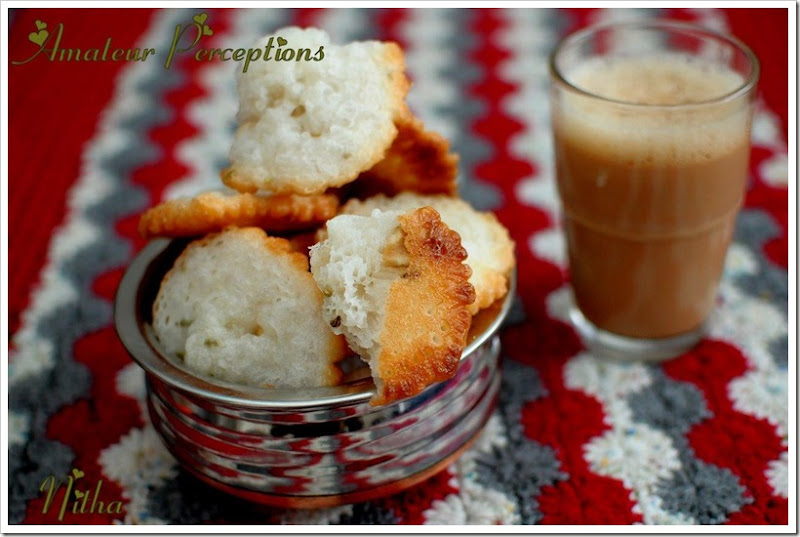
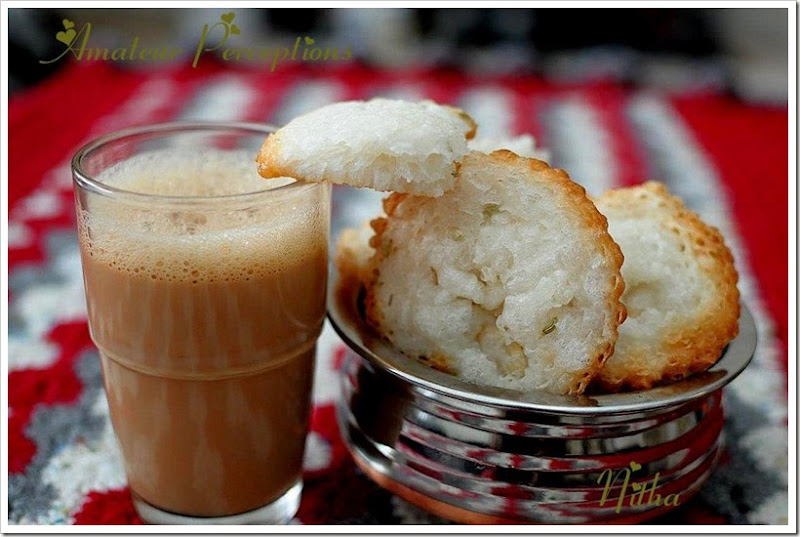
KunjiKalathappam–A deep fried snack made of rice & coconut milk

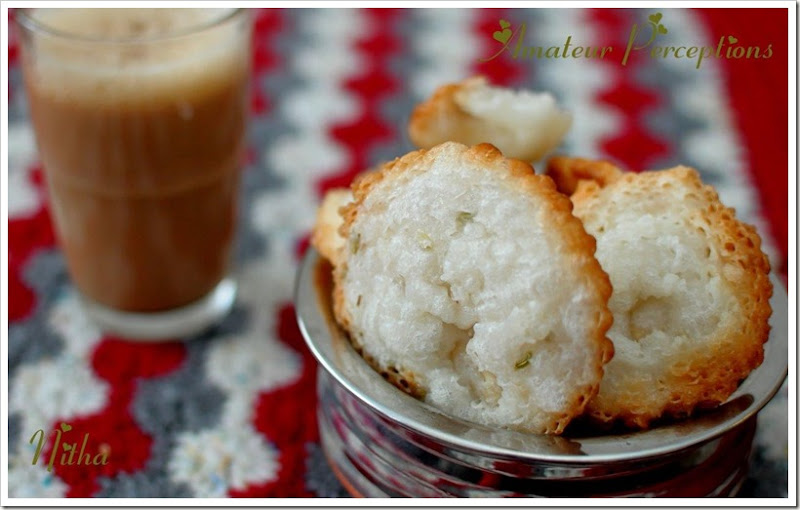
This is a delicious snack from the northern part of kerala. I am not sure about how to translate the name in English. May be -- A yummy deep fried snack made of rice & coconut milk

KunjiKalathappam 1

Ingredients:

Ponni Rice         --   1 cup
Sugar                   --   2 cup
Coconut Milk   --   1 cup, thick coconut milk.
Fennel Seeds   --   1 tsp
Sa Jeerakam/Caraway Seeds --   1 tsp
Cashew Nuts   --   10 - 15, broken into small pieces
Salt                     --   a pinch
Coconut Oil     --   As required for deep frying.

KunjiKalathappam 2


Preparation:

Wash and soak the rice in water for one hour.

Sprinkle 2 - 3 tbsp of boiling water over 1½ cup of shredded coconut. Squeeze out the thick coconut milk from it and keep aside. You can also use canned coconut milk. But believe me, fresh coconut milk gives a special flavour.

Add half of the coconut milk to the rice and sugar and grind it. Add the remaining coconut milk little by little while grinding to attain the required consistency. I had couple of tbsp coconut milk left over after grinding. The batter should be smooth without any grainy effect and the consistency of the batter should be in between idly and dosa batter. Make sure that the batter is not too thin. So it is better to  start with a thick consistency and add more coconut milk if required.

Once the batter is ready, add the fennel seeds, sa jeerakam, broken nuts and salt and mix well.

Heat oil in a kadai/cheenachatti. Pour a ladle full of batter into the hot oil. Should not turn the appam upside down to cook. To cook the top part, with the help of a spoon, pour the hot oil from the kadai onto the top of the appam until it is cooked. The appam should be white in colour with a light brown bottom.

Serve with tea or keep munching any time J

KunjiKalathappam 3

Recipe Courtesy: Sabi Aunty

Friday, March 22, 2013

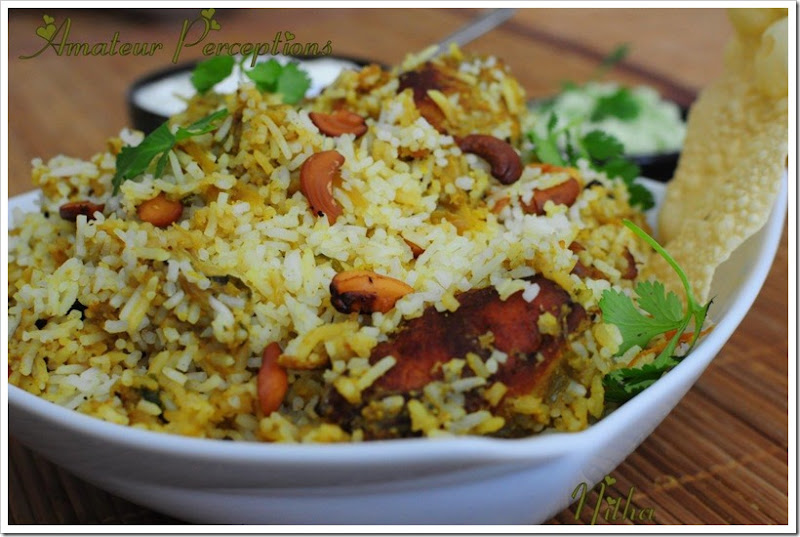
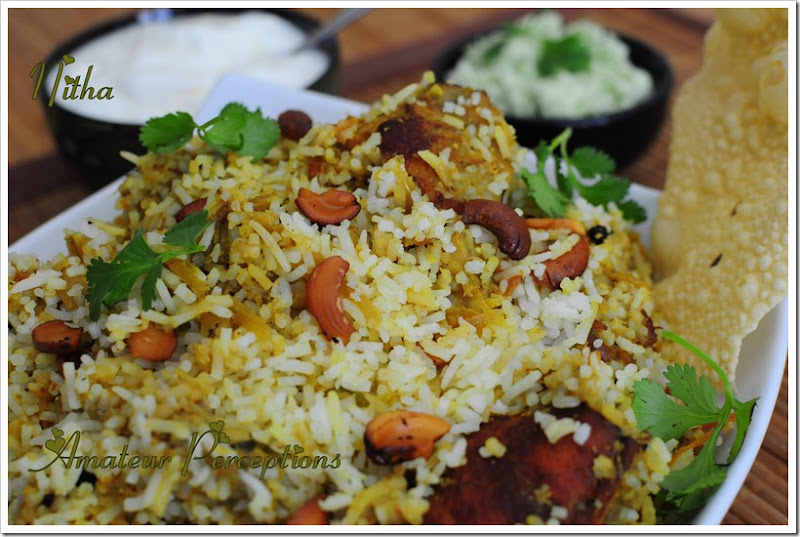
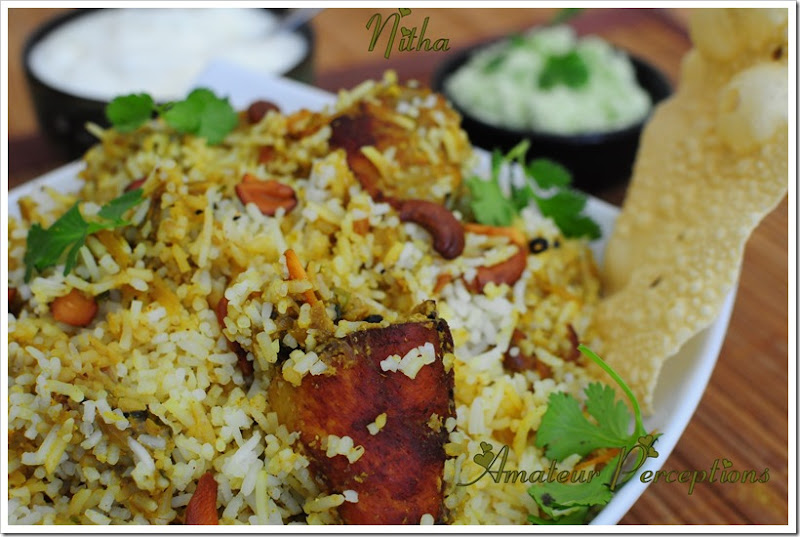
Malabar Chicken Biriyani – A way to Celebrate 3rd Blog Anniversary

Chicken Biriyani 1

Ingredients: (Serves 5 - 6)

Marinate:

Chicken                     --   1 kg
Turmeric powder --   ½ tsp
Green chillies         --   4 – 5 (adjust according to your taste)
Garlic                         --   5 - 6 cloves
Ginger                        --   2 inch piece
Yogurt                       --   ½ cup
Salt                              --   as required

Masala:

Onions                       --   3 large onions
Green chillies         --   4 - 5(adjust according to your taste)
Garlic                         --   5 - 6 cloves
Ginger                        --   2 inch piece
Tomatoes                 --   3 medium tomatoes
Turmeric powder  --   ½ tsp
Coriander powder --  1 tbsp
Almonds/Cashew  --  12 - 15
Mint Leaves             --  ¼ cup chopped, loosely packed
Ghee                           --  3 tbsp
Oil                                --  as required to fry the chicken.
Salt                              -- as required

To Grind:

Cloves                         --   5
Cardamom                --   3
Fennel seeds            --   1 tsp
Cumin seeds             --   ½ tsp
Cinnamon sticks     --   3 inch piece
Star anise                   --  2 petals

To Garnish:

Coriander leaves   --   ½ cup chopped, loosely packed
Mint leaves              --   ½ chopped, loosely packed
Ghee                           --   1 tbsp

Chicken Biriyani 2

Rice:

Basmati Rice           --   3 cups
Water                         --   6 cups
Cinnamon                --   2 piece.
Cloves                       --   4
Cardamom              --   2
Bay leaves               --   2
Whole pepper        --   1 tsp
Ghee                          --   3 tbsp
Lemon Juice          --   4 - 5 tbsp
Cashew nuts & raisins  --   as required

Preparation:

Gravy:

Clean and cut the chicken into medium size pieces. Grind the green chillies, ginger and garlic. Marinate chicken with salt, minced masala, turmeric powder and yogurt (in the marinade section). Keep it aside for 2 hours or overnight.

Soak the almonds/cashews in water.

In a pan, slightly cook the chicken in the water that has come out after marinating. Cook just until the colour of the meat changes, or just until it boils. Switch off the flame and drain the chicken into another pan. Save the remaining water - the stock.

Chicken Biriyani 7   Chicken Biriyani 8

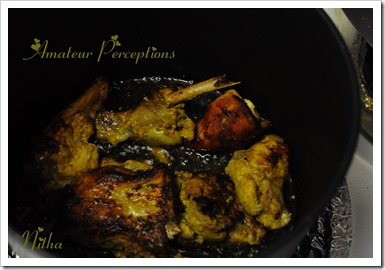
Heat oil in a pan. Shallow fry the chicken until it is slightly brown.

Meanwhile chop onions, tomatoes, coriander leaves & mint leaves.

Grind the cloves,cardamom,fennel seeds,cumin seeds,cinnamon sticks and star anise into a slightly coarse/fine powder (For the gravy) and keep aside.
 
In the same grinder, grind green chillies, garlic, ginger and half of the mint leaves and keep aside.

Once the chicken is fried, In the same pan, add the ghee, then add ground ginger garlic chilly paste. Fry for half a minute. Then add onions and fry until mushy. Add the tomatoes and fry until they are mushy and the masala is dark brown. Add salt and the spice powders in the order - turmeric, coriander powder and ground masala (leave a pinch aside for garnishing). Fry until the raw smell goes off.

Add chicken and let it cook. Add the chicken stock kept aside. Add more water if required.

Grind the nuts into a fine paste and add it to the masala. Let it just boil. Add the remaining mint leaves and switch off the flame. This should form a semi thick gravy. Keep aside.

Chicken Biriyani 3

Rice:

Wash the rice and drain it in a strainer. Keep aside for 10 - 15 minutes so that the water is completely drained off.

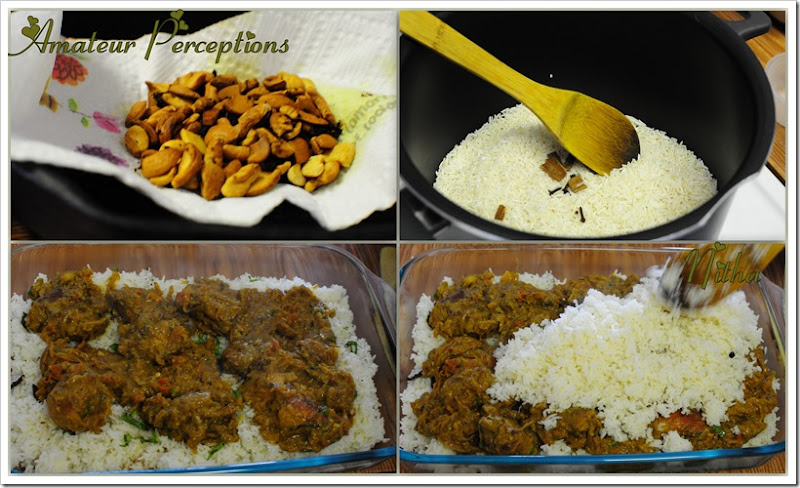
Heat ghee in a deep pan. Add cashew nuts. Fry until light brown. Add raisins.Let it puff up. Drain it and keep aside.

Add the whole spices. Fry for a minute or two.Add the strained rice.Meanwhile keep the water to boil. Fry the rice until the water boils. Once the water boil, pour it into the rice and mix. Add required amount of salt and do a salt check on the water. Close the pan and let it cook on a medium flame. The rice will completely absorb the water and will be cooked to 90%. Do not let the rice cook 100% as it ll be overcooked after the dhum process.  Let it cool. Spread the rice on a flat platter to cool it quickly. Use a fork to spread. Using a spoon might break the rice.

Chicken Biriyani 9

Assembly:

Take a heavy bottomed pan or an oven safe dish, if baking. Spread the ghee at the bottom. Generously spread the first layer of rice. Sprinkle some garam masala and chopped leaves. Add some nuts and raisins. Sprinkle some lemon juice.(You can also add the lemon juice while cooking the rice. This is to make the rice softer.) Then add the masala. Top it with rice and the garnishing. Repeat this until the rice and the gravy is used. Make sure to top it with the rice and the garnishing. I use a flat pyrex dish and hence have only 3 layers – rice – gravy – rice. 

Chicken Biriyani 10

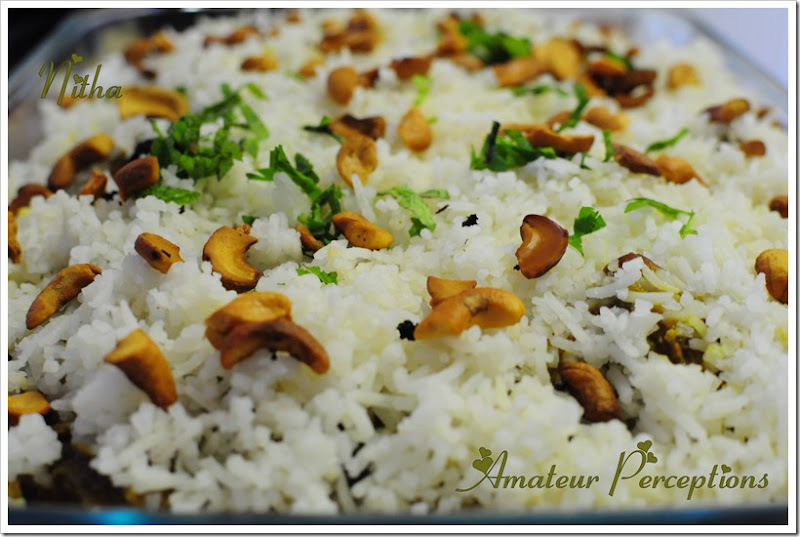
Preheat the oven to 250 F. Cover the dish tightly with an aluminum foil and  bake it for 25 mins. Back home, my mom does this in a heavy bottomed pan. She will have around 5 – 7 layers. Close the pan with a tight lid. At times to keep the lid tight, she sticks it with maida dough. Keep the pan on a low flame and also have some charcoal or embers of coconut husk on the top –> The traditional way of baking.

Mix it well and serve with raita, pappad and chammanthi.

Chicken Biriyani 5

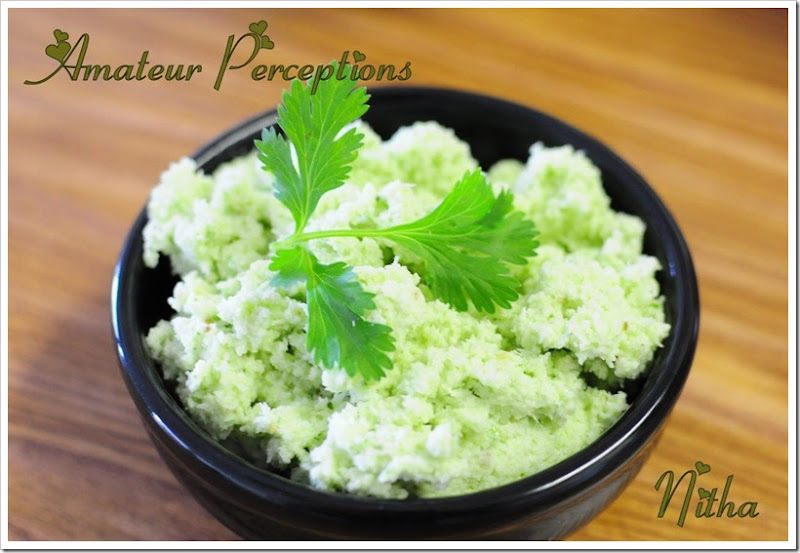
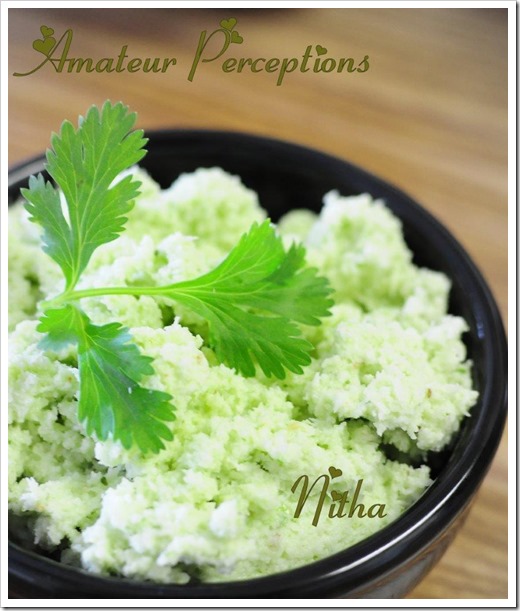
Chammanthi:

Chicken Biriyani 11 - Copy

Ingredients:

Grated Coconut     --   1 cup
Mint leaves              --   3 - 4 leaves
Coriander Leaves --   2 sprig
Green chillies         --   2
Lemon Juice           --   1 tbsp
Salt  to taste

Preparation :

Blend everything except lemon juice to a  smooth mixture. Add the lemon juice and mix well. Serve with hot biriyani. 

Chicken Biriyani 11

Recipe Courtesy: Amma

Friday, March 15, 2013

Chocolate cake

Hello everyone.. It has been a while since I wrote something here. I was busy with work and now too busy being a working mom. Luckily I am out of my kitchen nowadays as I have my mom here with me. I know it is not tuff and I am not the first person to be so. Its just the matter of getting used to and getting into a routine. Till then, I would like to describe myself as “BUSY”… he he ..  It has been few days that I thought of writing something here, to open up my mind. I know all of us, genuine bloggers, are against plagiarism. Some see their recipe stolen, few lovely pics and even the whole blog is stolen at times.

But have you ever thought of the thought being misunderstood as a thief when you did not even think about that? Yeah someone pointed at me thinking I stole something from their blog without giving them due credit.  I was so sad and disappointed when I came to know that. I did speak to that person and I tried to explain my innocence. But not sure if they believed me or not.  I never got a convincing reply. May be they still believe that I am the culprit….

Believe me, I am now scared to even look into another blog – May be I get inspired reading those and might use similar words in describing my recipe, especially when I try to translate Malayalam into English. Friends.. Let me know what you would  have done in such a situation.
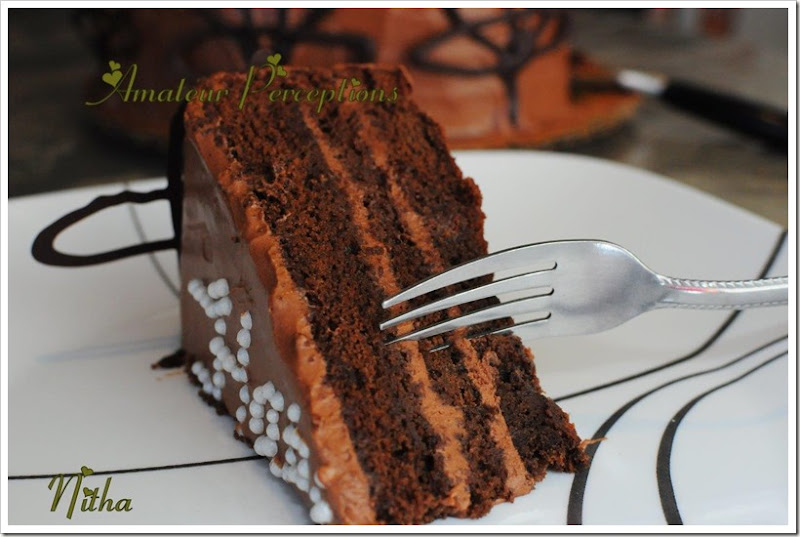
Chocolate Mousse Cake 8

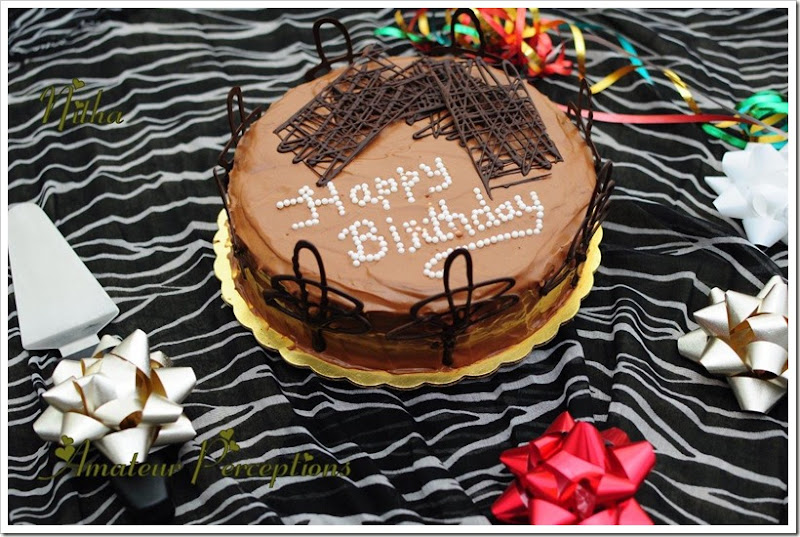
Okay… Now coming to the cake. I made this for my dad’s bday. I have never seen him celebrate his bday. He doesn’t believe in celebrations during bdays.  He never wished us ‘Happy Bday’ on our bdays. But we used to gave small get togethers for our bdays when we were kids. I ve even tried asking him to wish me. His answer is “veruthe enantham kalikkathe po” – Let me try to translate it. Something like “Just go away without kidding” Smile. Eventhough I made the cake, I did not expect he would cut it. But he happily did that .. may be to make us happy or may be he was also happy doing it or may be he is getting into these celebrations. Anyways…. love you Acha and wishing you a very Happy Birthday once again…..

I wanted to post this on that day(13th) itself. But as mentioned above, getting used to the new roles and trying to fit everything into schedule, this was something I could push apart.  
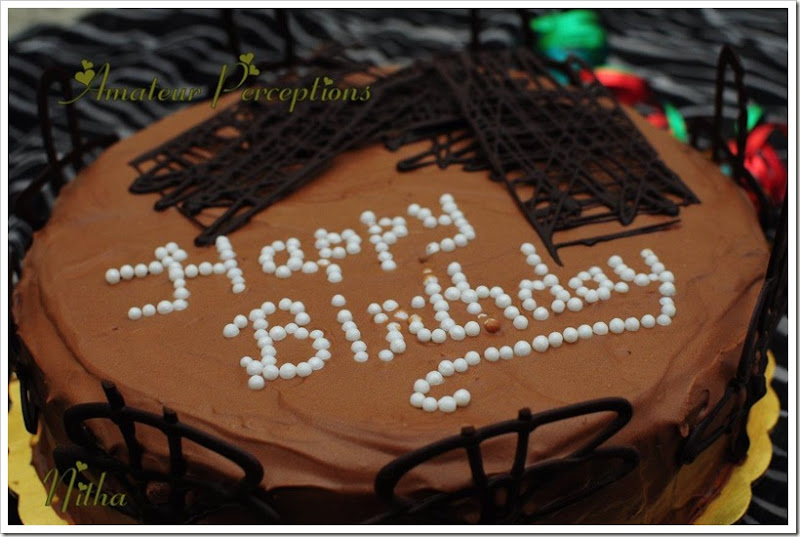
Chocolate Mousse Cake 7

Ingredients for the base cake:

All-purpose flour, sifted  --   2/3 cup
Dutch-processed cocoa powder --   2/3 cup
Vanilla extract  --   1½ tsp
Hot clarified unsalted butter --   4½ tbsp
Eggs --   6 large
Sugar --   1 cup

Ingredients for the Filling:

Confectioners' sugar --   1 lb
Unsweetened cocoa powder --  ½ cup
Butter        --   1 stick or ½ cup, at room temperature
Vanilla extract --   1 tsp
Boiling water  --   1/3 cup
Heavy cream --   2 cups
Simple syrup --   1/3 cup, (equal amounts sugar and water, simmered until sugar dissolves)

Ingredients for the Decoration:

8 ounces semisweet chocolate, melted


Preparation of the base cake:

Preheat your oven to 350F.

Fit the bottom of a 9-inch round cake pan, with parchment paper and set aside.

Sift together the flour and cocoa three more times and set it aside. This helps the cake to be airy.

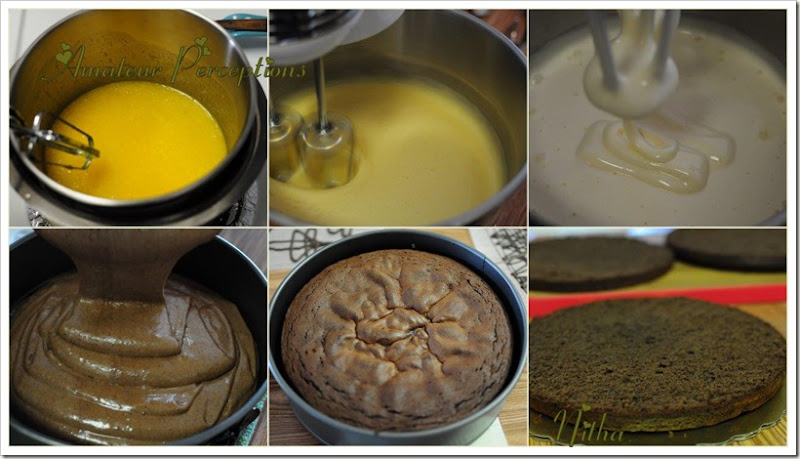
Whisk eggs and sugar together in the bowl of an electric mixer. Set the bowl over simmering water and heat the eggs, whisking constantly, until they are slightly warm. Remove it from the water and beat the eggs at high speed until they have tripled in volume. They should form a ribbon when the whisk is lifted. It took around 25 - 30 minutes with my hand mixer.
Chocolate Mousse Cake 1

Sift the dry ingredients into the egg mixture and gently fold in. This should be done in 3 - 4 batches.

Mix hot clarified butter and vanilla extract in a bowl. Add about 1 cup of the batter into the mixture and fold together until well blended. Add this over the batter and gently fold it in. This helps the butter to combine well into the batter without too much of mixing.

Pour into the cake pan and bake for 30 to 35 minutes, or until the top of the cake springs back when pressed gently. Let it cool completely and then get prepared for the decoration and fillings.

Chocolate Mousse Cake 9

Preparation of the filling:

I made using half of the above quantity. With an electric mixer beat the butter until light and fluffy. Sift the confectioners' sugar and cocoa powder into and mix until completely combined. It will be in a powdered state and not creamy at this stage. I couldnt get any pictures at this point.

Add the vanilla and boiling water and mix until smooth.

In another bowl, whip the heavy cream until soft peaks. It is better to chill the bowl and the whisk before whipping. Add this into the chocolate mix and fold in until completely combined
Chocolate Mousse Cake 6

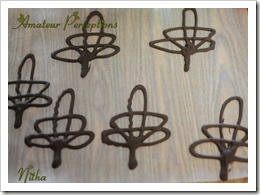
Preparation of the decorative pieces:

Get ready with the parchment paper spread on a flat surface. Keep a ziplock cover open and ready to use.

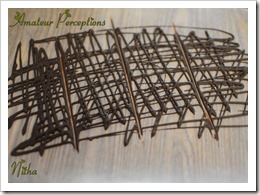
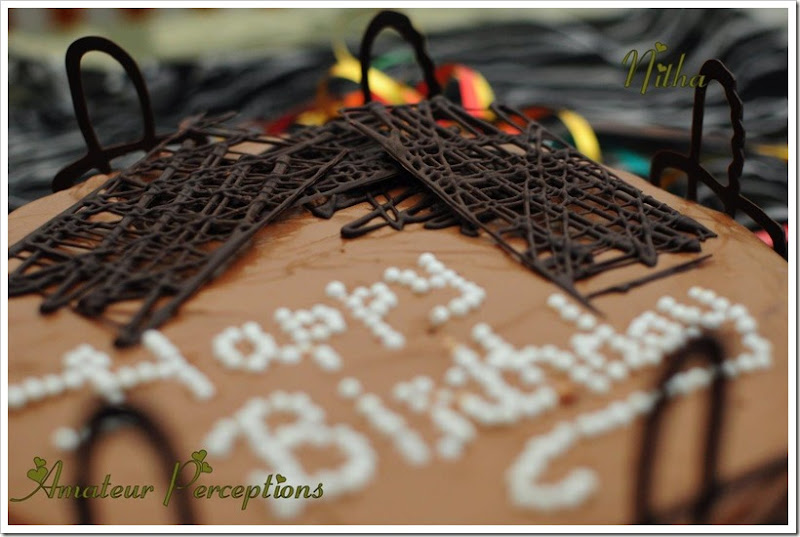
Grate the chocolate onto a parchment paper. Take 2/3 of this in a bowl and microwave for 10 secs. Take it out and mix well. It wouldnt have completely melted at this stage. Do not heat it at a single strech. Because atleast a part of the chocolate get over heated and hence will loosen the molecules and the chocolate will not hold its shape.

Repeat for 2 - 3 times until the chocolate is completely melted. Add the remaining chocolate into it and mix well. If it is too hard, keep in the microwave for another 5 - 10 secs. Pour this into the ziplock cover and draw the patterns as per your ideas. Let it cool completely before you remove it from the parchment paper. Decorate.
Chocolate Mousse Cake 2  Chocolate Mousse Cake 3   Chocolate Mousse Cake 4

For a better idea of tempering and decorating visit the videos at howtocookthat.

Assemble the cake:

Cut the cake into 3 horizontal layers. Place the base layer on a 10 inch cake board. Generously brush the top with the simple syrup. Add 1/3 of the filling and level it. Repeat this with the next layer and top it with the final layer. Cover the whole cake with the remaining filling and decorate according to your ideas.
Chocolate Mousse Cake 5

Recipe Courtesy:
Base Cake: CafeFernando
Decoration: Howtocookthat
Filling: Started with food network ended in my own recipe as the other one was too sweet for us.

Sunday, March 10, 2013

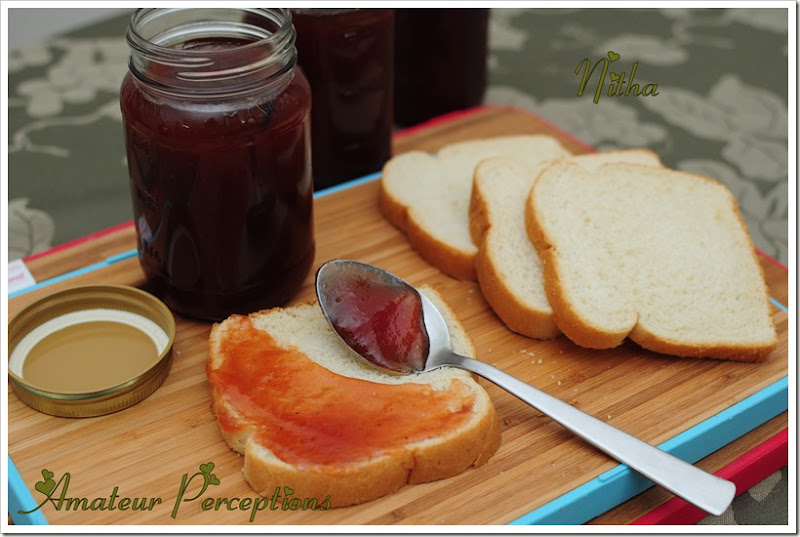
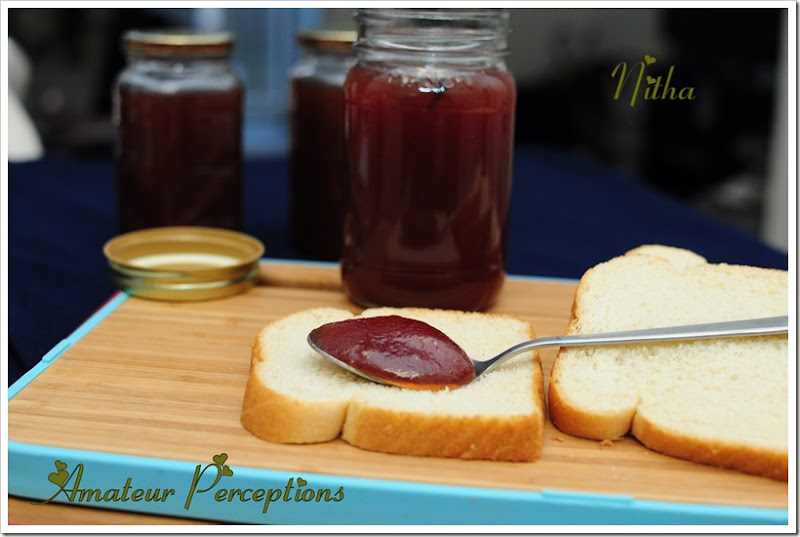
Mixed Fruit Jam

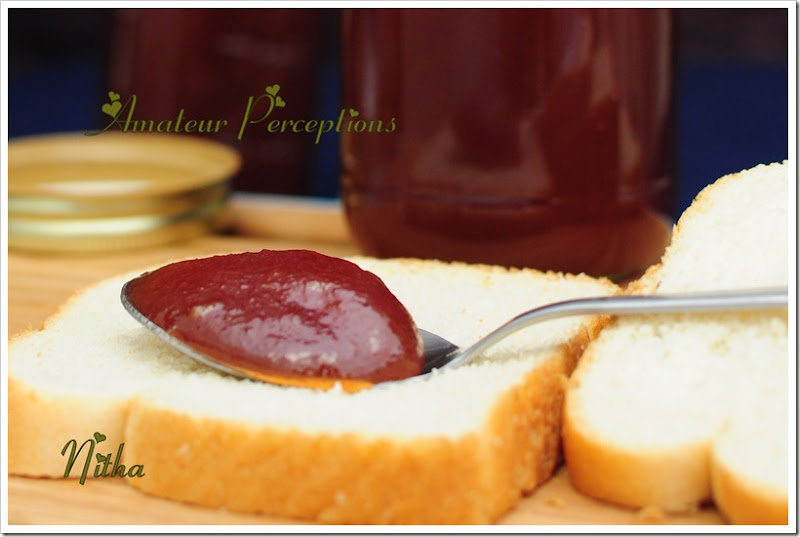
Mixed Fruit Jam 11

Ingredients (Yields around 2 kg):

Apple                 --   2
Grapes               --   60 nos
Pineapple         --   ½ of a medium size one
Banana               --   2
Orange               --   1
Sugar                  --   approximately 1.5 kg
Cloves                --   4
Beetroot juice --   2 tsp, extracted from ½ of a small one
Citric acid / lemon juice -- 1 tsp

Mixed Fruit Jam 9
Preparation of the Jam:

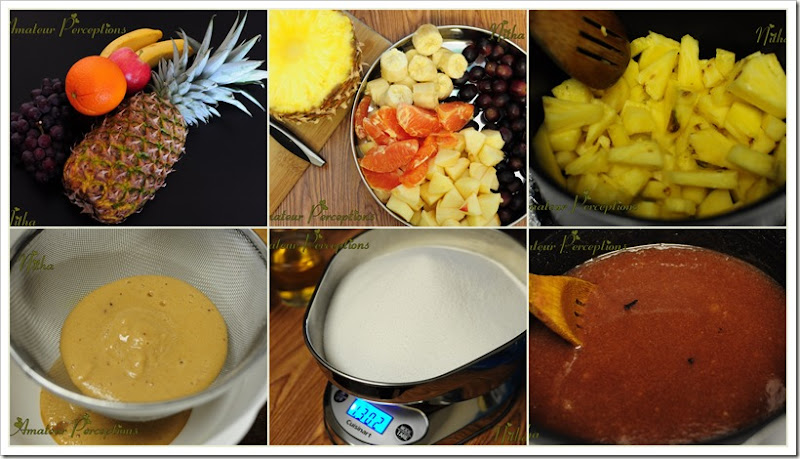
The above ingredients includes the fruits which I preferred and had handy. You can use any fruits which you like.

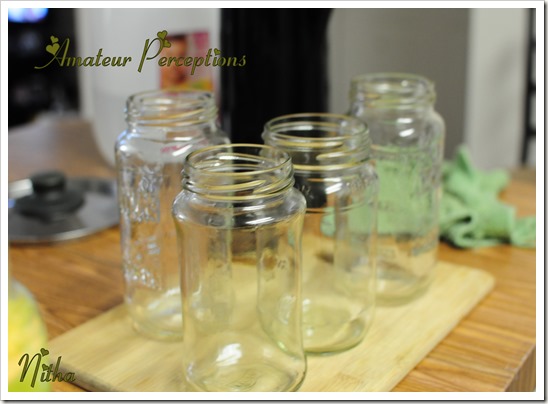
Prepare all the equipment --> jars, pan, spoons, cutting board,knife, mixer etc. Wash them and let them dry completely.

Water is the major enemy here. If kept away from water, the jam do not need any specific preservatives added.

Wash the apples and grapes and let them dry. I did wipe each grape to make sure that there is no drop of water.Peel and chop all the fruits.

Pineapple needs some special attention. Cook the chopped pineapple and let it cool.

In the dry mixer, grind all the fruits. Sieve the pulp into a big bowl.Weigh the mix. You need equal amount of sugar as much as the fruit pulp. For the above measurement of fruits, I had to use 1.3kg of sugar.It depends upon the size and number of the fruits and hence its always a good idea to weigh them.

Mixed Fruit Jam 0

Extract the beetroot juice and add the citric acid to it. Keep it aside.

Keep the glass jars ready to pour in the jam. It is better to keep the jars on a wooden plank / cutting board. This helps to prevent the possibility of breaking the glass jars, when pouring the hot jam.

Add the sugar and the fruit pulp into a heavy bottomed pan. Add the cloves to the mix and cook. Keep stirring continuously and make sure that it doesn't stick on to the bottom of the pan. When the jam is almost 90% cooked, add the beetroot juice mix. This gives the lovely colour to the jam.

Mixed Fruit Jam 7     Mixed Fruit Jam 8

To check the readiness of the jam: Take some water in a small bowl. Add a drop of the jam into the water. If the jam dissolves in water, it is not yet ready. If it sinks to the bottom of the bowl and stays down,the jam is ready.

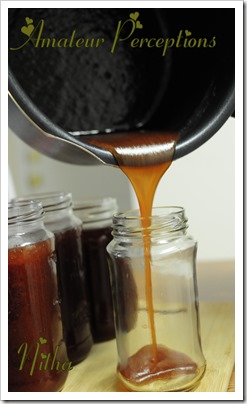
When the jam is ready, immediately switch off the flame and pour into the prepared bottles. I always prefer my jam to be a bit loose than thick, so it is easy to spread.

Do not close the jam bottles until they are completely cool. Once cooled, refrigerate it for a better life.

Mixed Fruit Jam 10

Recipe Courtesy: Amma

Sunday, March 3, 2013

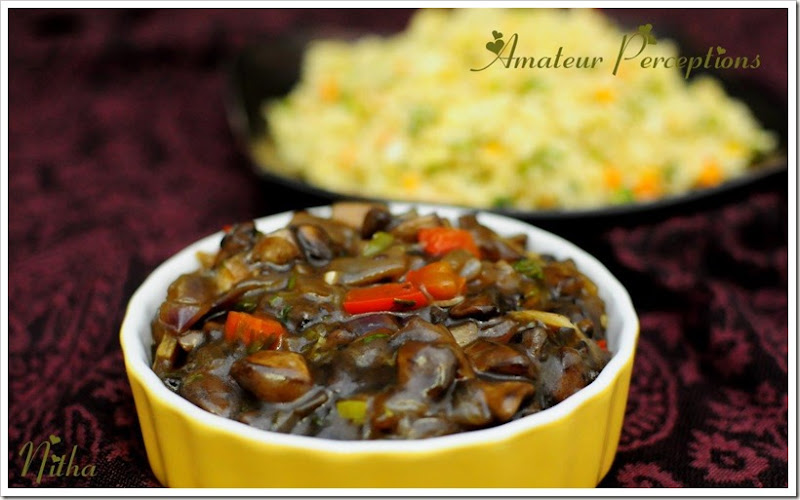
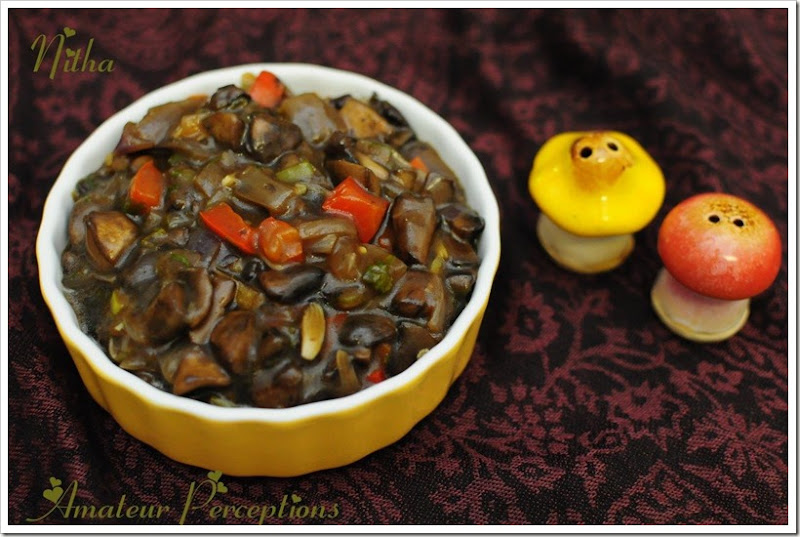
Chilly Mushroom–Version 2

Chilly Mushroom 1

Ingredients:

Mushrooms                     --   200 gms
Onion                                 --   1 medium size
Ginger Garlic  paste     --   1 tsp 
Green Chillies                 --   2 - 3
Capsicum                         --   ½ of a medium size, I used red capsicum
Soya Sauce                      --   1 tbsp
Green chilly Sauce       --   1 tbsp  + more as per your taste and tolerance
Tomato Sauce                --   2 tsp           
Pepper Powder              --   ½ tsp 
Corn flour                         --   2 tsp
Spring Onion                   --   2 stalks
Coriander Leaves          --   to garnish
Oil                                         --   as required
Salt                                       --   to taste

Chilly Mushroom 2

Preparation of Chilly Mushroom:

Clean and cut the mushrooms. Marinate it with 1 tbsp of soya sauce, 1 tsp corn flour and a little salt. Keep it aside for 15-20 minutes.

Meanwhile, chop the onions and capsicum into small cubes, slit the green chillies and finely chop the spring onions.

Water comes out of the mushrooms when marinated with salt. Drain the mushrooms from the liquid and keep both the mushrooms and the water aside.

Heat oil in a pan and add mushrooms. Fry the mushrooms until they are cooked and slightly brown. Drain it into another bowl and keep aside.

In the same pan, add more oil if required and add the chopped onions, green chillies and ginger garlic paste. Fry until the onions are slightly transparent. Add the chopped capsicum. Fry for few minutes and then add the chopped spring onions. Fry for a couple more minutes.

Once they are done, add the fried mushrooms, and give a stir to mix. Add the chilly sauce and the tomato sauce. Pour in the water that came out of the mushrooms and mix it.Let it come to a boil. Check the gravy.

If more gravy is required or if the gravy is too thin, mix the remaining corn flour in ½ cup of water. Add this to the mushroom gravy and let it slightly boil. Switch of the flame, sprinkle the pepper powder and garnish with chopped coriander leaves.

Recipe Courtesy: Amma