Tuesday, January 10, 2023

Milk Pudding


I did not get any pictures of this yummy dessert, however wanted to save the recipe as this included a bunch of mix and match on the ingredients and quantity.

This is a variation of the Snow white pudding, but since it is hard to find agar agar here, I had to test and try my luck with the gelatin proportions.
 
 
Ingredients (Serves 8-10) :
 
 
Milk                                                  --    2 cups
Condensed milk                             --    1 tin
Heavy Whipping cream                --    1 cup
Sugar                                               --   If needed
Cold Milk                                         --    1 cup
Gelatin                                --    2.5 tbsp / 7 tsp
Vanilla Essence                              --   ½ tsp
Crushed Pineapple                      --   1 cup. You can use any fruit as per your wish and the quantity depends on the size of the tray you use.
Almonds/Cashews                         --   ½ cup
Sugar                                                 --  ½ cup
Butter                                                --   1 tbsp  + 1 tsp
 
 
Preparation of milk pudding:
 

Base of the pudding:

Chop the pineapple into small pieces and cook them in 2 tbsp of water. If using canned pineapple cook them in the water in the can. I used fresh fruit. You can also add sugar as needed. But make sure the pineapple is not caramelized.  

Set the pudding pan by spreading 1 tsp of butter. Once the pineapple is cooled, spread this in the pan. This is the base of our pudding.  

You can view the step by step pics here - Snow white pudding

Crunchy Topping:

Prepare a pan or plate lined with parchment paper, to pour in the hot caramelized nuts.  

Add the sugar into a heavy bottomed pan and let it caramelize. Once it turns into a light brown colour, add the butter and stir in well until completely melted. Meanwhile, it will turn a little darker. Switch off the flame. Add in the chopped nuts and stir well.  

Pour the mixture onto the prepared pan and spread. Let it cool. Once it is completely cool, using a rolling pin, crack/powder them into crunchy bites. You may also pulse small pieces in the blender.

Store in an air tight container. This can also be made well in advance. I have saved this for more than a month.  

Milk pudding:

Mix the gelatin in the cold milk and mix well. Keep aside and let it bloom for about 5 - 10 mins.  

Mix milk, whipping cream, condensed milk, vanilla essence and sugar (if needed, depending upon the sweetness required after adding the condensed milk)  

Heat it on medium-low heat until it is really hot and about to boil. Let it not boil or simmer  

Add the gelatin milk mixture at this point and stir well.  

Pour the mix into the pudding pan. Let it cool completely.  

Refrigerate for 6-8 hours or overnight. Sprinkle the topping on the pudding before serving.  


Friday, January 28, 2022

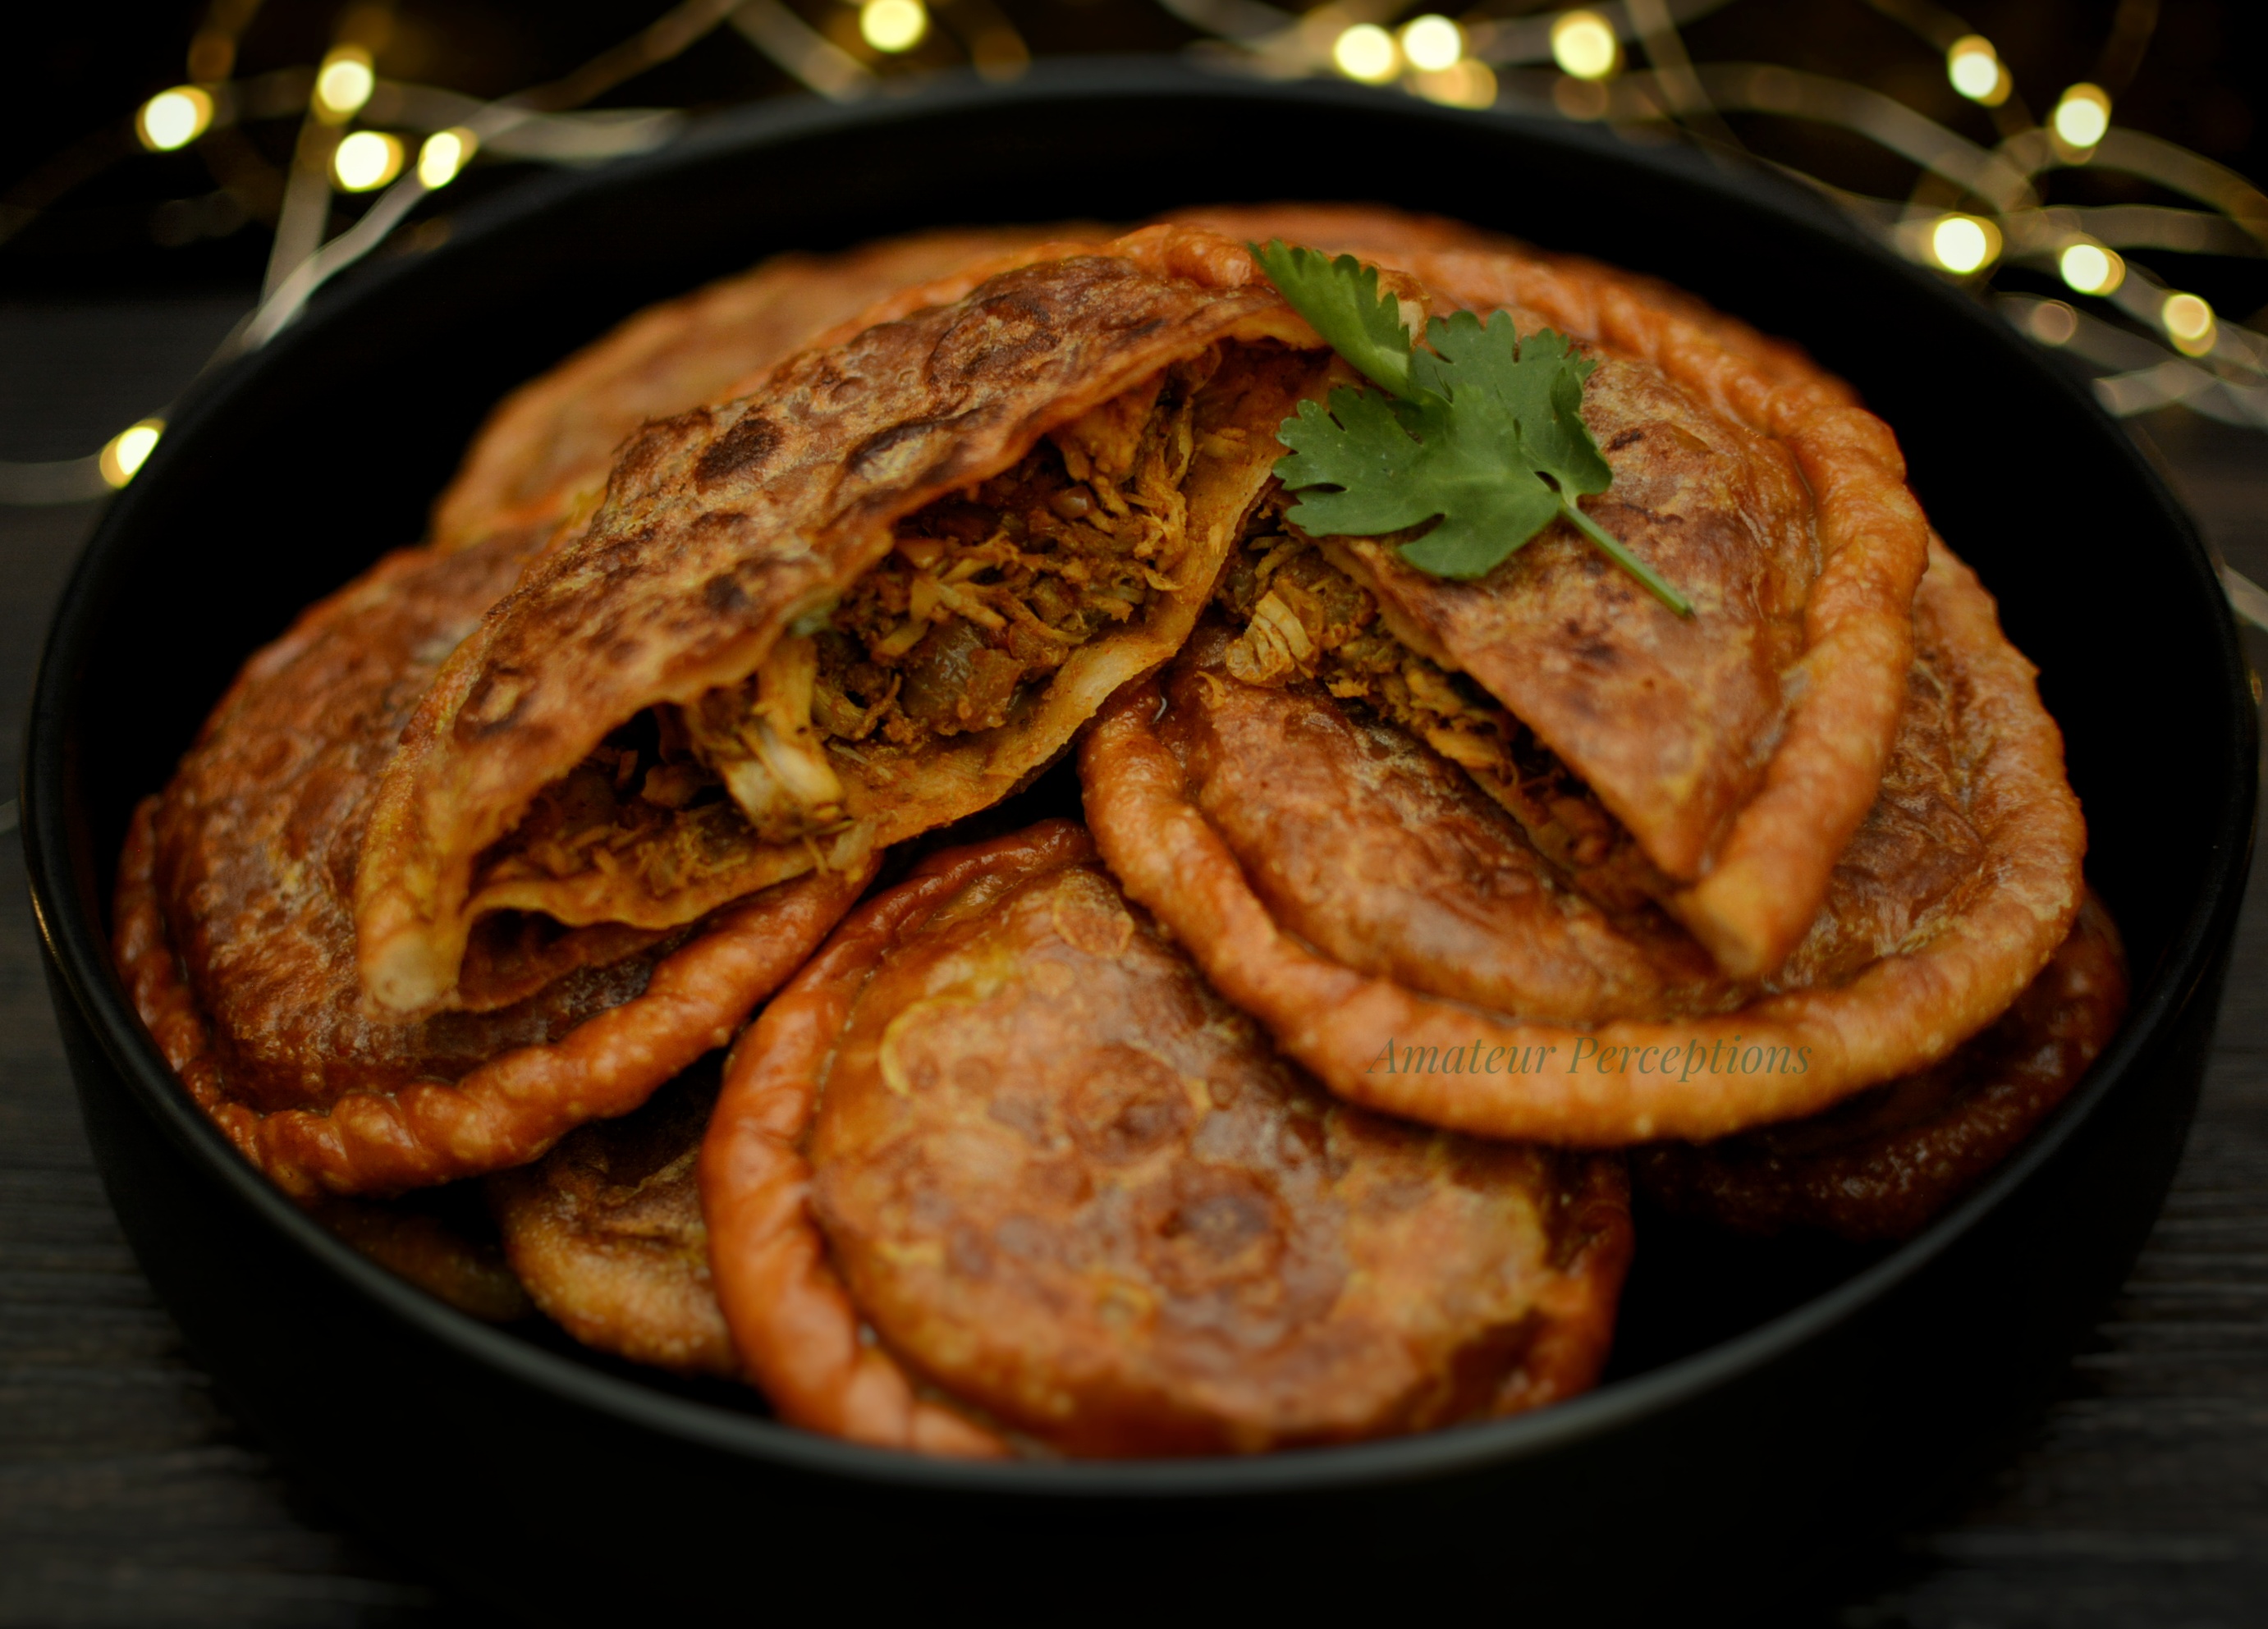
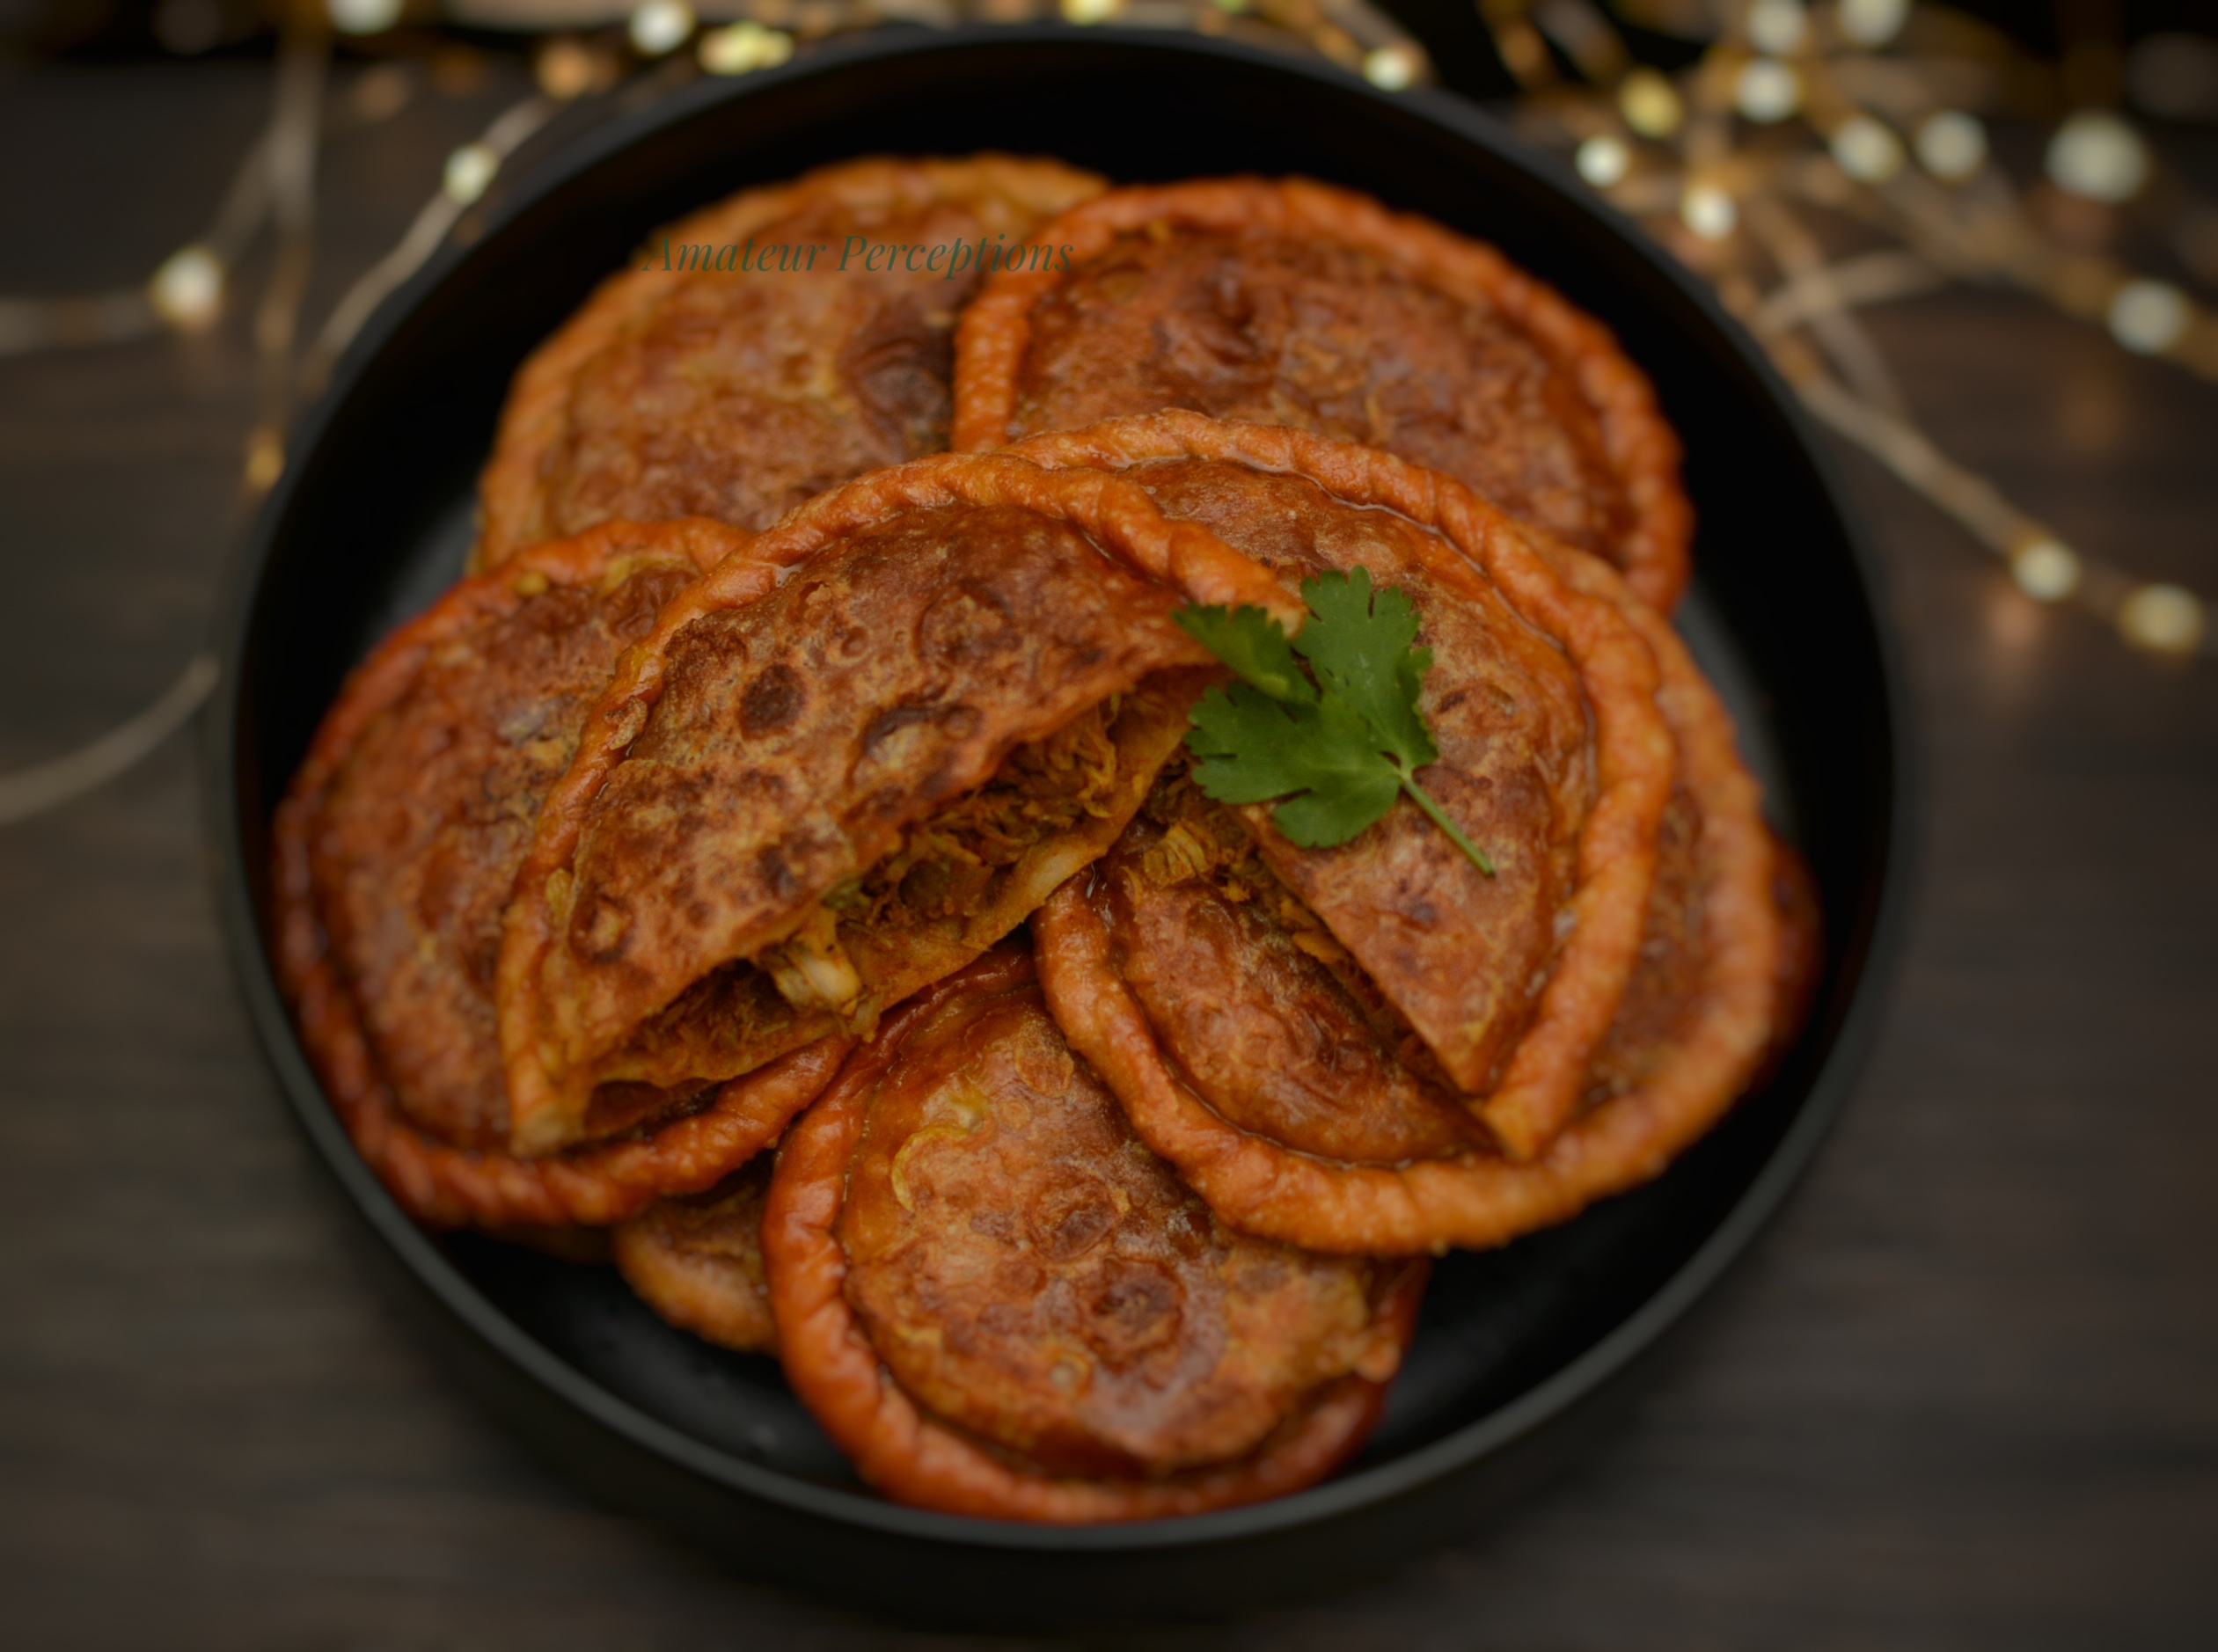
Erachi Pathiri

Erachi Pathiri 9


Ingredients (Serves 8-10):

Chicken breast        --   1 lb
Turmeric Powder      --   ¼ tsp
Chilly Powder          --   1 tsp
Salt                        --   as required

Filling:

Onions                   --   3 medium sized
Green Chillies         --   5 - 6
Ginger Garlic Paste  --   1 tsp
Coriander leaves     --   a handful chopped
Turmeric Powder     --   ¼ tsp
Pepper Powder        --   1 tsp
Fennel Powder        --   1 tsp
Garam Masala         --   ½ tsp
Salt                        --   as required
Oil                          --   1 tbsp

Pathiri:

All Purpose Flour     --   1 cup
Wheat Flour            --   1 cup
Salt                       --   as required
Luke Warm Water   --   as required
Oil                         --   To deep fry
Ghee                     --   2 tsp

Custard mixture for the coating :

Eggs                      --   2 large
Milk                       --   ½ cup
Sugar                     --  4-5 tbsp
Cardamom Powder  -- ¼ tsp
Salt                        --   as required

Oil / ghee               -- required for shallow frying


Erachi Pathiri 9


Preparation of erachi pathiri:

Marinate the chicken with turmeric powder, chilly powder and salt. Cook until done and the water is completely evaporated. Shred the chicken pieces with a fork or spoon. Do not shred in the mixer. It is good to have the meat with the strands. Keep aside

In a large frying pan, add oil and saute the thinly sliced onion, green chillies, ginger garlic paste and salt until the onions are translucent.Add turmeric powder, fennel powder and pepper powder and saute for few more minutes. Add the shredded chicken and mix well. Saute for few more minutes until they are well combined. Switch off the flame and add the coriander leaves and garam masala and mix well. The mixture should be dry. Keep aside.

In a bowl, add the all purpose flour, wheat flour and salt. Add ghee and rub it well into the flour. Add the luke warm bottle a little by little and form a soft dough, same as poori dough. Divide into equal sized small balls. 

Roll each ball into not too thin or not too thick circles. I also used a saucer to cut them into equal sized circles. This helps when we stuff the filling and close the pathiris.

Based on the size of the pathiris, take 1 - 2 tbsp of the meat mixture and spread on one pathiri.

Make sure not to over fill the pathiri as it would break while frying. Also make sure to leave quater to half inch space towards the end of this pathiri for us to seal it well.

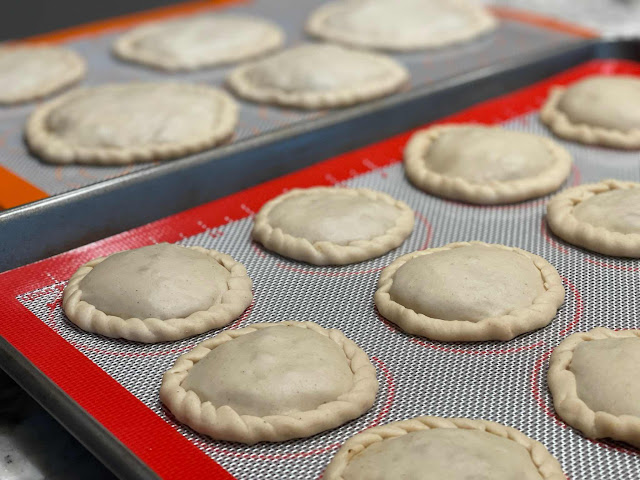
Place another pathiri on the top of the one with meat spreaded. Seal the edges by slightly folding it from bottom to top. You could also use a for to slightly press the edges to seal them well. Whichever technique you use, make sure to not have any tears or gaps.

Repeat this with all the pathiris and keep aside.


Erachi Pathiri 9


Heat oil in a heavy bottomed pan. Set to medium heat and fry each stuffed pathiris until they are golden brown. Drain them into a paper towel. Repeat until all are done.

For the custard mixture, add the eggs, milk, sugar, cardamom powder and salt and beat well until well combined.

Heat a frying pan and add 1-2 tbsp of oil or ghee or an equal mixture of both (I like it that way). Dip each stuffed pathiri into the custard mixture and shallow fry them on medium flame. Make sure to tun around in between to make sure both the sides are cooked well. Drain them and serve as a snack or a light meal.

This even works as a lunch box item for my little one. I prepare it the day before and heat it up the next day.


Thursday, November 18, 2021

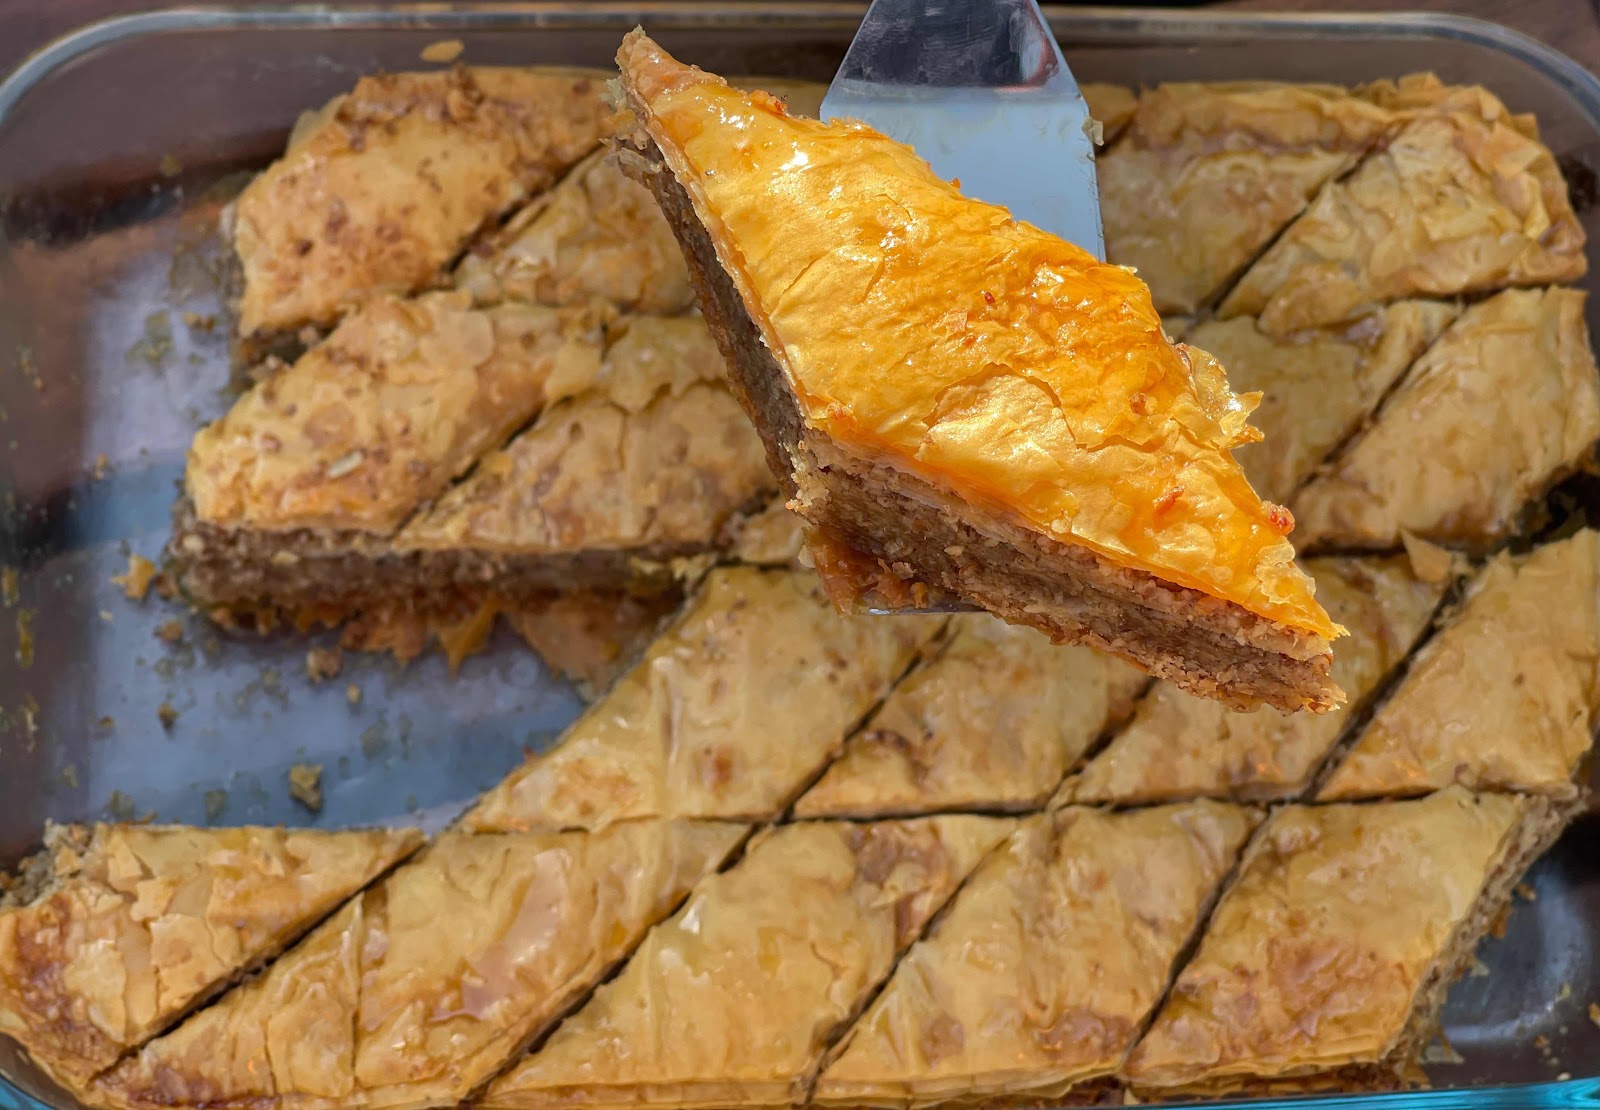
Baklava


 Ingredients (Serves - 25 - 30):


       Phyllo Dough               -  1 package, thawed to instructions    
       Butter                            -  1½ cup , 10oz
       Walnuts / Pistachios -  1 lb, finely chopped, about 4 cups - I prefer pistachios
       Cinnamon Powder    -  1 tsp
       Granulated Sugar      -  1 cup  
       Honey                          -  1 cup
       Water                           -  3/4 cup
       Lemon Juice               -  2 tbsp


Preparation: 

   Thaw the phyllo dough according to the package directions. 

   Meanwhile lets prepare the sugar syrup as that has to be cool to room temperature before pouring on the baklava.

   Into a heavy bottomed saucepan, add 1 cup sugar, 1 cup honey, 3/4 cup water and 2 tbsp lemon juice. Let it come to a boil and keep stirring until the sugar dissolves. Simmer for another 4-5 minutes. Keep it aside and let it cool.  
    
   Chop the nuts into fine pieces. I used my food processor and pulsed them 10-15 times, until they were finely chopped. Add the cinnamon powder and do a once last pulse to mix it well.

   Once the phyllo sheets are thawed, lets get started to prepare the baklava. 

   Preheat the oven to 325 degree Fahrenheit.  Melt the butter in a bowl and keep aside. 

  Using a pastry brush, butter the bottom and the sides of a 13x9 baking pan. Trim the phyllo sheets if required. You can also fold it as you layer.  One package of phyllo sheet usually consists of 40 sheets. Once the package is opened, make sure to keep the phyllo sheets under a damp towel. If kept open, the sheets will turn dry and brittle making it hard to handle and layer.

  Place 10 phyllo sheets in the pan, one after the other, brushing each sheet with butter once it is in the pan and before placing the next sheet. ie Place a phyllo sheet, brush it with butter, place the next phyllo sheet, brush it with butter and so on. 

  Once the 10 sheets are placed, evenly spread a little more than 3/4 cup of the nut mixture on top of the buttered sheets.  

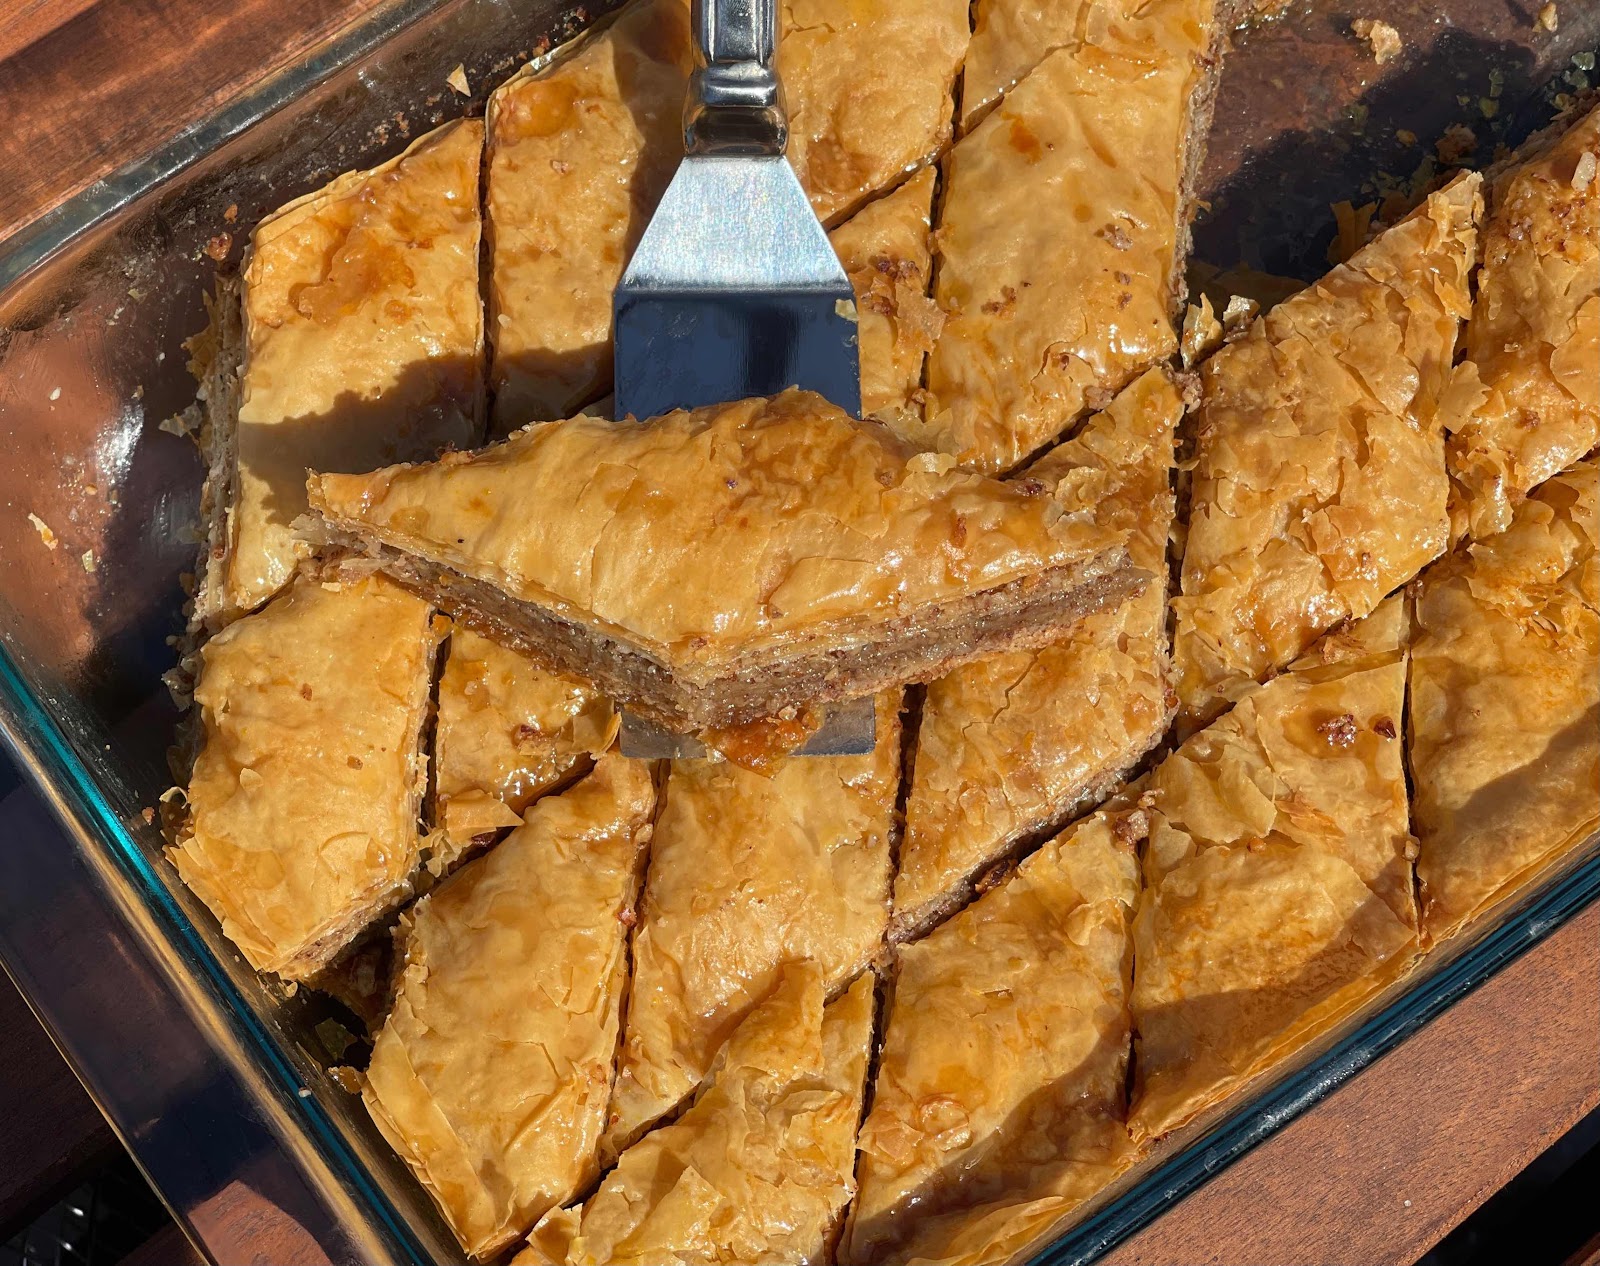
   Now add next 5 phyllo sheets in the same order as sheet - butter - sheet. Top it with nut mixture and then continue for 4 layers.  Finally top it with 10 sheets. 

  10 sheets - nut mixture - 5 sheets - nut mixture - 5 sheets - nut mixture - 5 sheets - nut mixture - 5 sheets - nut mixture - 10 sheets 

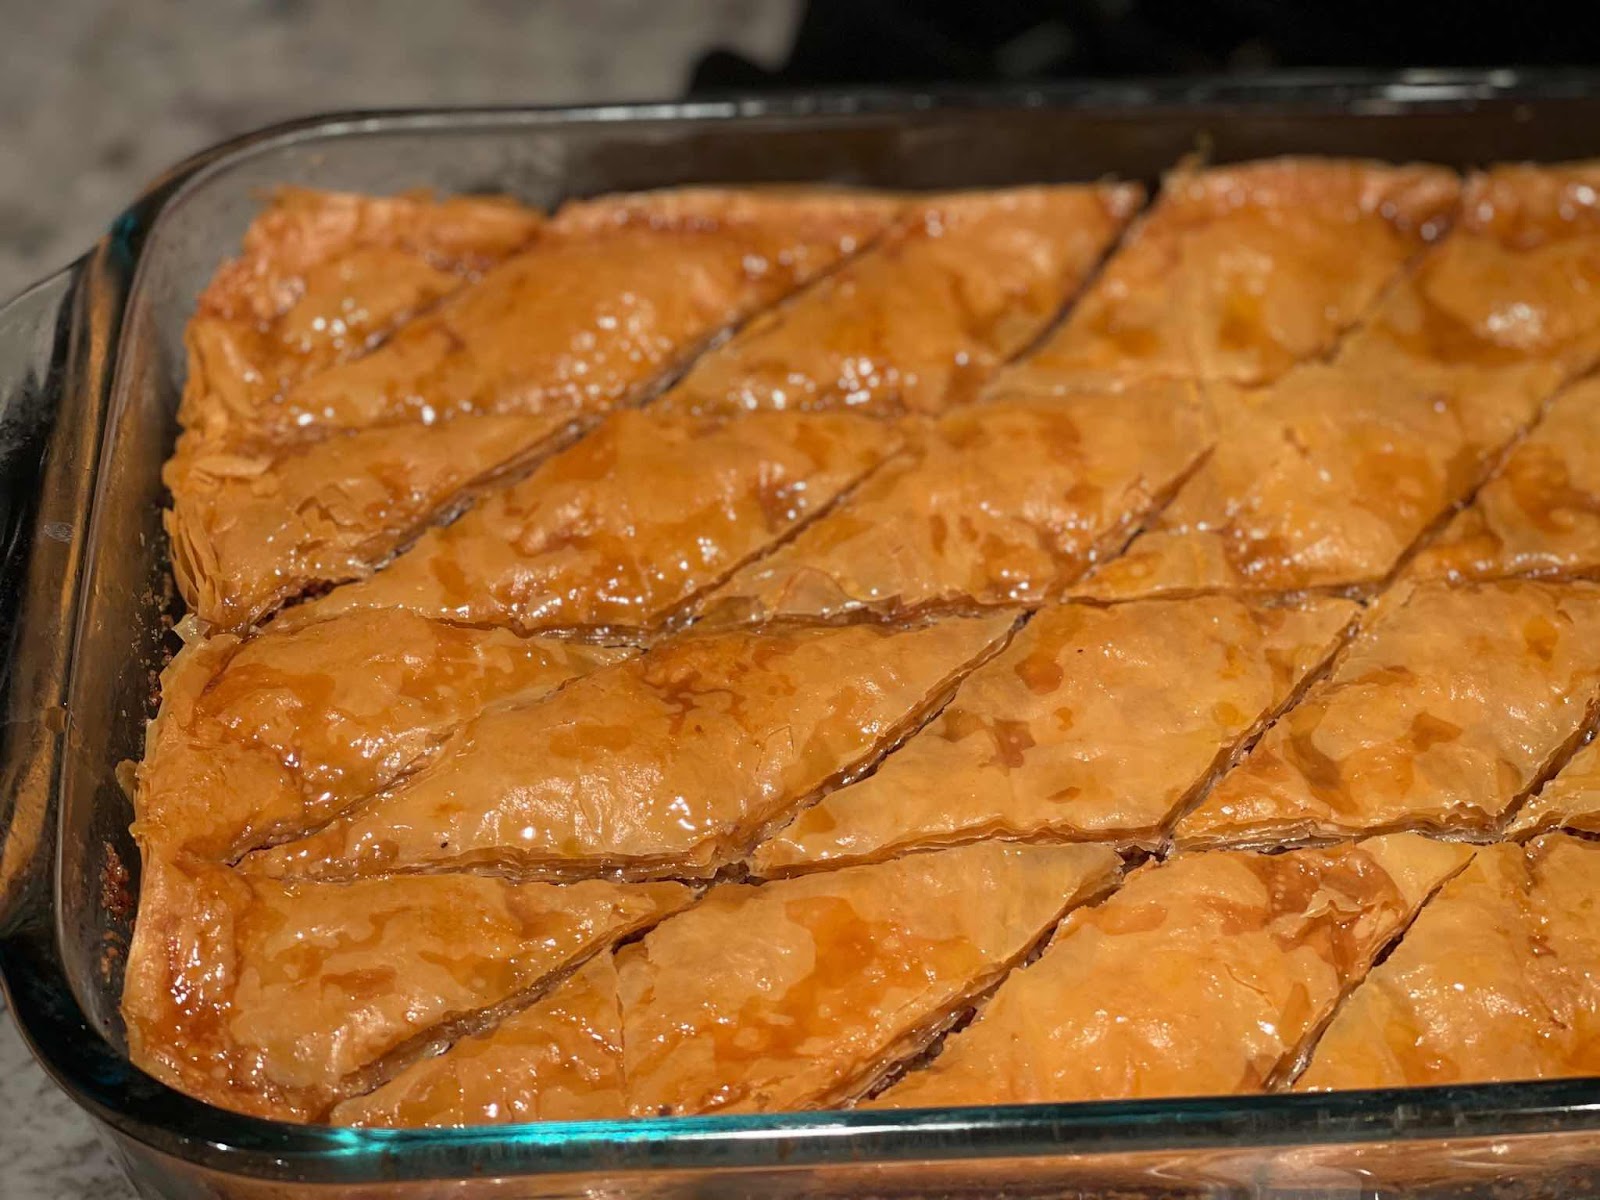
  Cut the sheets into equal width strips, around 5.  Then cut diagonally ( or into squares as required) to make a perfect size serving.


   Bake at 325 F for 1 hour and 15 minutes or until the top turns golden brown.

  Remove from oven and immediately pour the sugar - honey mixture evenly onto the baklava. You should hear that sizzling sound. Using a spoon helps to pour evenly. 

  Let it cool completely at room temperature. Leave it uncovered until then. Give another 5-6 hours to have the syrup soaked in and let the inner layers soften. 

It is the best to serve it the next day. This can be left at room temperature for 1-2 weeks and hence a dessert that can be prepared in well advance.


Recipe Courtesy: Natasha's Kitchen

Tuesday, August 17, 2021

Dulce de Leche Cake

This is one other keeper. Had no plans to blog on this and did not prepare for a better photo shoot.  However, this being a keeper, wanted to save this recipe ☺


Ingredients (Yields -  a quarter sheet, 4 layer cake - serving 15 - 20 pieces):

Caramelized nuts for a crunchy layer:

        Almonds / Cashew Nuts -- 2 cups chopped roughly (a mixture of both together works too)
        Sugar -- 2 cups
        Butter -- 3 tbsp

Cake:

        All Purpose Flour -- 2 cups
        Eggs  -- 4
        Sugar -- 1 cup
        Salt -- ½ tsp
        Sour Cream -- 1 cup
        Baking Soda  -- 1 tsp
        Baking Powder  -- 2 tsp
        Dulce de Leche -- 14oz / 1 can

Dulce de Leche Syrup for soaking:

        Evaporated Milk -- 8 oz
        Dulce de Leche -- 14oz / 1 can

Dulce de Leche Cream:

        Butter (room temperature) -- 8 oz
        Cream Cheese (room temperature) --  8 oz
        Dulce de Leche -- 14 oz / 1 can
        Heavy whipping cream -- 16 oz


Preparation:

    Dulce de leche can be bought from the store or prepared from condensed milk cans. I usually go for condensed milk as that gives me a better flavour. 

    Remove the paper cover from the condensed milk cans. Fill a pressure cooker / instant pot with water to cover the cans completely. Pressure cook for ~45-50 minutes. Once the cans are cool to touch, take it out of the water and let it cool completely before opening the can. Leaving the cans in the water will let it rust and the cooker will be hard to clean.

    I usually leave the cans on the counter overnight to avoid any risk of opening the hot cans. This can be prepared days in advance.

Caramelized nuts for a crunchy layer:

    Prepare a pan lined with parchment paper, to pour in the hot caramelized nuts. 

    Add the sugar into a heavy bottomed pan and let it caramelize. Once it turns into a light brown colour, add the butter and stir in well until completely melted. Meanwhile, it will turn a little darker. Switch off the flame. Add in the chopped nuts and stir well.

    Pour the mixture onto the prepared pan and spread. Let it cool.

    Once it is completely cool, using a rolling pin, crack/powder them into crunchy bites. You may also pulse small pieces in the blender.

    Store in an air tight container. This can also be made well in advance. I have saved this for more than a month.

Cake:

    Preheat the oven to 350 degree with the rack in the middle. Line a large 12x18 inch baking sheet pans with parchment paper or silicone mats and set aside.
    If preparing a round cake, three 8 inch round pans can be used.

    Beat the eggs, sugar and salt in a stand mixer for ~10 minutes. Once done, the egg batter should be in a ribbon fall consistency - the batter should fall like a ribbon and stay so for 2-3 seconds.

    Meanwhile, in another bowl whisk/beat the sour cream, dulce de leche and baking soda until no lumps are left over. Make sure to use a bigger bowl than the quantity to start with as whipping the mixture will aerate and increase the volume.

    Fold the two mixtures together. Make sure not to over mix, else the batter will be deflated. 

    Divide the batter into equal parts and spread to form an even layer. Bake for 9 minutes for the sheet pans (12 minutes if using the round pans). A toothpick inserted should come out clean at this stage. Remove from the oven and let it cool completely.

Dulce de Leche Syrup for soaking:

    Combine the evaporated milk and the dulce de leche with a whisk or blender until there are no lumps.  

Dulce de Leche Cream:
    
    Add the butter and cream cheese into a bowl and whip them for ~4-5 minutes until fluffy. Divide  the dulce de leche into 2 and add one after the other, whipping in between to have it just incorporated. Do not over mix.

    Whip the cream using a mixer, until medium peaks and fold it into the butter cheese mixture, again in two additions, making sure not to deflate both the mixtures.
    
Assemble the cake:

    Invert the cakes onto another sheet pan or cutting board and peel off the parchment paper.  Cut each cake into two equal pieces - for the four layers. (If using a round pan, cut each cake horizontally into equal pieces for 6 layers.)

    Keep aside ~2 cups of the cream to decorate the outside of the cake.

    On the serving plate or cake board, spread a thin layer of the cream and align the first cake layer. Layer the cake by soaking each layer with the soaking syrup, spread the cream on top and then sprinkle the crunchy caramelized nuts over the cream. Divide each of these equally into the number of cake layers. 
    
    Repeat for each layer. Once the final is done, decorate the top and sides with the reserved cream. 

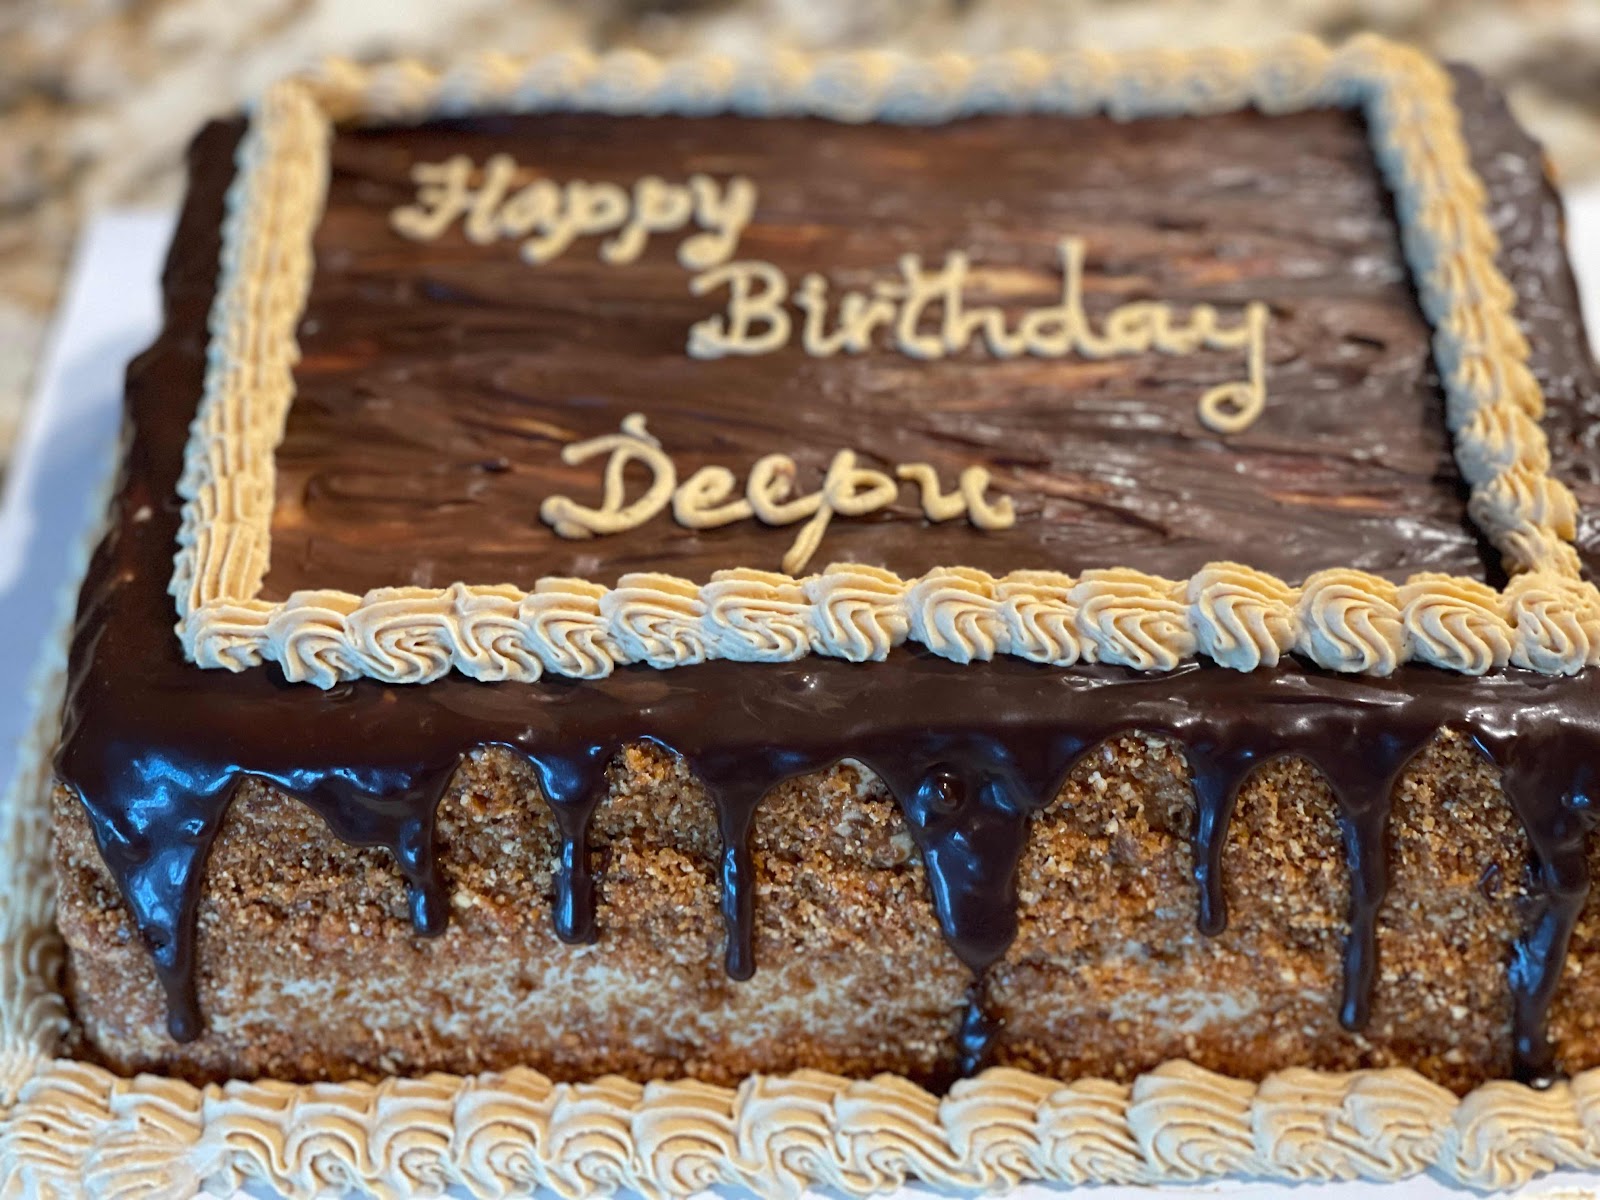
    Use ganache or chocolate chips or any topping as required to decorate.

    Chill for 4 -5 hours before serving. Serve cold.

Wednesday, May 12, 2021

Achappam / Rosette Cookies kerala style


Ingredients(Yields - 40 medium size achappam):

        Rice Flour -- 1 cup
        All Purpose Flour --  1/2 cup
        Sugar -- 3/4 cup
        Salt -- a pinch
        Thick Coconut Milk -- 1 cup
        Egg  -- 1, beaten
        Sesame Seeds -- 1 tsp
        Coconut Oil / any refined oil -- as needed for deep frying


Preparation:

Mix together the rice flour, all purpose flour, sesame seeds, sugar and salt using a whisk. Add the beaten egg and coconut milk to form a semi thick batter - similar to or a little thicker than dosa batter. 

Set it aside for 30-45 minutes. 

Heat oil in a wok. Have the achappam mould in the hot oil while it heats and 2-3 after the oil is sizzling hot. 

The mould has to be really hot for the batter to really stick onto it. I used a nonstick mould and hence prior preparations were not necessary. If using any other metal mould, dip it in oil overnight or more before you start making achappams. 

When the mould is hot enough, take it out of the oil shake of any excess oil and dip in the batter until the mould is half covered , or 3/4th covered. Never ever allow the batter to over flow the mould, otherwise it would not get released. 


Take the mould out of the batter and dip into the hot oil. Wait until the sizzling reduces well and then gently shake off the mould to have the achappams detach from the mould. As soon as the batter is cooked, it should release by itself. 

Turn it over and cook until both the sides are golden brown. The colour darkens after you take it out as well. So take care not to burn it. Once they are cooked remove from oil and drain on a paper towel. 

Heat the mould again and repeat the process. I leave the mould in the same oil after detaching the achappam, so that it stays hot. Based on the size of the pan, you can make as many as long as they don’t overlap each other. 

This is not at all hard as it is being told 😊. The nonstick moulds are a blessing too. 


Thursday, February 11, 2021

Naadan Laddoo with camphor


Ingredients(Yields - 18 medium size laddoos):

Boondi:

        Kadala maavu / Besan Flour -- 1 cup
        Baking Soda --  a pinch
        Salt -- a pinch
        Turmeric Powder  -- 1 tsp (optional)
        Water -- as required
        Ghee -- 2 - 3 tbsp
        Vegetable Oil -- 2 cups or more as needed for deep frying

Sugar Syrup:

        Sugar --1 cup
        Water -- 1/4 cup
        Cardamom Powder -- 2 tsp
        Camphor -- 1 small pellet powdered(Optional)
        
To mix:
      
        Raisins --  a handful 
        Ghee -- 2 tbsp
        Kalkkandam -- 1/2 cup crushed


Preparation:

Mix the besan, baking soda, turmeric and salt. Add water little by little to form a batter similar to the dosa batter consistency.

Heat oil in a wok. Pour the batter into the hot oil through a round slotted spoon (check the mixture recipe for the picture). If the batter is too thick, boondi will be long in shape. If the batter is too thin, then boondi will be flat. Add more flour / water accordingly to adjust the consistency if needed.

Do not add over crowd the boondi in the oil as it may cling together and loose its shape. 


Let it fry just until it cooks or the sizzling stops, less than a minute. Drain onto a paper towel. Do not fry the boondi too crispy as this might not let the sugar syrup soak in.

Continue this until the batter is done.

Wipe the back of the slotted spoon for every batch, otherwise the batter will stick on it and not form a round shape.

Once the batter is done, add the prepared boondi into a bowl.  Add 1/3rd of the boondi into a mixer and just crush it to a coarse powder. Add this back to the bowl and mix. You now have a good blend of boondi powder and full shaped boondis.


Once the boondi is ready, prepare the sugar syrup. 

Mix water, sugar, cardamom powder and powdered camphor in a sauce pan. Let it boil until it starts bubbling up. Switch off the flame. Add colour at this stage if you wish to do so, I did not as the turmeric did give a nice yellow colour to the boondis. 

Do NOT wait until string consistency, it might harden the sugar as it cools. We have used only less water to form firm laddoos. If you like your laddoos to be softer, add a little more water, but not more than half a  cup.

Quickly add the sugar syrup to the prepared boondi in a big bowl. Mix well with a spoon. Add ghee and raisins (you can fry the raisins in ghee, if you wish to. I just added it as is) at this stage. 

Let it cool to touch, add the kalkkandam and mix well. If you add it while hot, it might melt the kalkkandams. The boondi might have soaked in the sugar syrup by now and you should have a warm sticky mixture. 

While it is still warm, grease your palms with ghee, take a handful of the mixture and roll into ball. Work quickly, not bothering to shape it well. Once all the balls are made, wash your hands, grease again and then roll the balls into a smooth shape.

Let it sit for a day to let the flavors blend well. 

Enjoy !! 


- I couldn't take any step by step pictures. Will make a note to take some good pictures next time and update :)


Paneer Bhurji


Ingredients(Serves –4 ):

Paneer                          -- 250 gms
Onion                            -- ½ cup, finely chopped
Ginger Garlic Paste  -- 1 tsp
Green Chillies             -- 2
Tomato                         -- ¼ cup, chopped
Turmeric Powder     -- ¼ tsp
Garam Masala            -- ½ tsp
Cumin seeds               -- ¼ tsp
Coriander leaves      -- 1 - 2 sprigs
Oil                                   -- 1 tbsp
Salt                                 -- as required

Paneer Bhurji 3


Preparation :

If you are making paneer at home(refer here), you can avoid the steps of shaping it up. If using store brought paneer, grate it and keep aside.

Heat oil in a heavy bottomed pan, add the cumin seeds, chopped onions, green chillies and ginger garlic paste. Saute until the onions turn brown.

Add the tomatoes and saute until they turn mushy.

Add turmeric powder, garam masala powder and salt mix well. Saute until the raw smell goes off.

Add paneer and saute until the paneer blends into the masala.

Garnish with chopped coriander and serve hot.

Paneer Bhurji 2

Tuesday, January 5, 2021

Christmas Fruit Cake covered in royal icing (Old fashioned Kerala Bakery Style)


Ingredients (Makes 2 - 9inch cakes):

Cake:
        
All purpose flour -- 3 cups (1 lb)
  Butter  -- 1 lb, room temperature
Sugar -- 2 cups (1 lb)
                Eggs -- 10
  Baking powder -- 1½ tsp
Cinnamon Powder -- ½ tsp
Clove Powder -- ½ tsp
Nutmeg Powder -- ½ tsp
                Vanilla Essence  --   ½ tbsp 
Honey -- 2 tsp
Glycerin -- 1 tsp (optional)
Caramelized sugar -- 1 cup sugar caramelized with ½ cup water

Mixed fruits (Tutti fruity, ginger snaps, citrus peels) -- 2½ cup - soaked in rum for atleast couple of months
Dry fruits (Chopped cashews, walnuts) -- 1 cup


Icing:
                Egg whites -- From 2 large eggs
                Confectioners Sugar -- 3 - 4 cups
                Lemon juice -- 1 tsp


Preparation:

Soak the fruits in rum for atleast 2 months or up to a year. I have also used the store bought candied fruits without soaking in rum. It enhances the flavor if soaked in rum.


Caramel:

Start with the caramel, add the sugar with water in a sauce pan and heat on medium flame. Let it boil. Once it starts to bubble, reduce the flame to medium low. It takes 15-20 minutes to get a dark brown colour. Take care not to burn the caramel. The caramel once cool should have the consistency of honey.

If it gets too hard, add more water and heat it up until it melts. If it is too thin, heat it for a little bit more time.  Keep an eye on it to make sure not to burn the caramel. I like to have it in a dark brown colour, but not burned.

While hot, it will have a free flowing consistency and thickens as it cools. Handle with utmost care. Never ever try to touch or lick the caramel at any stage before it is completely cool.


I usually prepare the caramel atleast a day before to have it cool while adding to the cake. At times I make for 2-3 batches together and save it in a mason jar.


Cake:

Prepare two 9 inch cake tins and keep aside.  At times I use small rectangular pans and this yields about 9-10 small cakes based on the size of the pans.

Pre-heat the oven to 350 F.

Separate the egg yolk and whites. Add the egg whites into a clean bowl. Keep it aside.

Sift the flour with the baking powder and the spice powders. Keep it aside.

Add sugar to the egg yolks and beat well. Add the butter and continue to beat until it is light and fluffy. 

Add vanilla essence, honey and glycerin. Beat well. 

Add the flour mix and mix on medium speed. Add the caramelized sugar syrup and beat again.

In another bowl, beat the egg whites until still peaks. If you do not have multiple mixer bowls, prepare the egg whites first and then start with the yolks. Make sure you prep all other items so that it doesn't have to sit so for long. I use my stand mixer for the batter and hand blender for the egg whites.

Add the fruits and nuts to the batter. Mix on medium speed.

Add the stiff egg whites and fold in into the batter. Do not over mix as that would deflate the batter. 

Spoon the batter in to the prepared pans and bake for 45minutes - 1 hour. This varies based on the size of the pans used. Keep an eye on the cakes after 45 minutes. Bake until the tooth pick comes out clean when poked in the middle of the cake.

Let it cool completely on the cooling rack. Cover the cake in a foil wrap tightly and keep it in a dark place for 2-3 days. This allows the flavors to blend well with the cake.

Slice and enjoy at this stage or you can also add more sweetness to beautify it with the icing.


Icing:

Add the egg whites to a clean bowl. Make sure the bowl and the beater is clean and free of any oil content. Beat until they form stiff peaks.
Add the confectioners sugar 2 tbsp at a time and let it mix well. Finally add the lemon juice and beat well. This should give a smooth and shiny mixture. 

While adding the sugar check for the consistency and make sure it is not too thick or not too thin. It should be a spreadable consistency. 

Working with Royal icing needs more practice and you can see that on my cake walls :) . I somehow managed to get a good swirl on the top.

Decorate it on the cake as desired. I gave an old fashioned - Kerala bakery style look adding couple of fondant flowers as well.


Recipe Courtesy: A bunch of good friends in Jacksonville and for the icing, I do not remember the site - I just searched on internet and found one

Sunday, September 27, 2020

Pappadam


Ingredients (Yields 20 - 25 based on size):


       Urad Dal whole        -  1 cup
       Baking soda             -  ½ tsp
       Salt                           -  1½ - 2 tsp    
       Oil                            -   2 - 3 tsp
       Water                        -  ½ cup
       All purpose flour      -  as required, while rolling


Preparation:

       Grind the urad dal into a fine powder. Sieve it using a strainer/sieve with small holes.

       Add the baking soda and salt to the urad flour. Give a quick mix. Add oil and start mixing to just incorporate the oil into the flour.

       Add water and mix well to form a thick rough dough. At this stage add more oil if needed, not more than a teaspoon.

       Transfer the dough onto a clean chopping board / counter top / any clean hard surface. Use a pestle to pound the dough. I actually started with the base of the mortar first and as the dough became softer, used the pestle to pound it better. This step takes approximately 15 - 20 minutes of continuous pounding.(Yes thats a good workout for your arms.) The dough would be now soft to handle.


        Roll the dough into a log, approximately half inch diameter. I divided the dough into two before I rolled. Using a knife cut the log into approximately an inch pieces.

        Roll each portion into small rounds, dusting with all purpose flour. Using a cookie cutter, or any round lid, cut the rolled ones into perfect rounds. I used a small lid and hence my pappadoms were a bit smaller than the regular size ones. However, size doesnt matter.

         Spread the pappadoms on a clean cookie sheet and let it dry under sun for 10 - 15 minutes. Flip them in 10 minutes to have it completely dry. Do not dry it too much as it might get stiff. It should still be pliable.

         Fry the pappadoms in hot oil. We fried all of it right then and hence not sure about the shelf life.


Recipe Courtesy: Ria's Collection / Story telling camera

Sunday, September 13, 2020

Turkish Tres Leches Cake


Ingredients (Serves 20 - 25):


     Cake: 
All purpose flour   --   2 cup 
Baking powder      --   2 tsp 
Salt                        --   ½ tsp  
Eggs                      --   6 
Sugar                     --   1½ cup 
Vanilla extract       --   1½ tsp  
Milk                       --   ½ cup 
Cardamom powdered --  1 tsp

     Milks: 

Evaporated Milk   --   12 oz can 
Condensed Milk   --   14 oz can 
Heavy Cream        --   3 cups 
Rooh afza              --   ½ cup (if you need a pink colour, this can be replaced with 2 tsp of rose essence, if you just need the flavor and not the colour.)


     Ashta - Final topping: 

Whole Milk          --   1½ cup 
Heavy Cream       --   1½ cup  
Corn Starch          --   6 tbsp 
Granulated Sugar --   ½ cup 


Preparation:

    Cake: 
Preheat the oven to 350F.  Prepare a 9x13 pan with atleast 2 inches depth. 
Sift the flour, baking powder and salt 2 - 3 times. Keep aside.  
Separate the egg yolks and the whites. 
Beat the egg white at a high speed until foamy. Gradually add sugar, few tbsp at a time. Continue to beat until the egg whites form a peak stage. Add the yolks, one at a time and beat until the mixture falls like a ribbon. 
Add the vanilla and mix well. 
Divide the flour mixture into 3 and add a portion at a time into the egg mixture using minimum speed or you can also fold using your spatula. Alternate with milk. Mix until just combined.  
Pour the batter into the prepared tin and bake for 25-30 minutes until the top springs back when touched.
Let it cool completely. 
Once cooled, poke the cake with a fork or knife throughout. 
Whisk together the evaporated milk, condensed milk and the heavy cream until combined. Add the rooh afza or the rose essence. Do a quick taste test and add sugar, if you need it sweet. I usually dont, but it is based on how sweet you want the cake to be. 
Carefully pour half of the mixture on the cake. Make sure to give a full coverage, especially on the edges. Let it soak completely. Once done, pour the remaining mixture on the cake. 
Let it sit in the fridge for 2-3 hours. 


Topping: 

Mix all the ingredients in a sauce pan. Whisk until well combined and no lumps. 
 Let it boil on a medium flame, the mixture will start to thicken. Let it thicken to a pudding consistency. 
Switch off the flame and let it cool for just 2 minutes (not any more as it will get set soon). 
Pour the mixture over the cooled cake and spread evenly.  Let it cool completely and leave the cake back in the refrigerator. It takes minimum of another 3-4 hours to have this set completely.
Garnish with pistachios and roses or any other condiments as desired. I just picked few dries roses from my garden.
You can have the toppings added on the same day or a day later, based on when you would like to serve the cake. 
This is how I prefer - 
Day 1 - Soak the cake and refrigerate

            Day 2 - Prepare the topping, spread on the cake and let it sit back in the refrigerator for another day

            Day 3 - Serve the cake 


Recipe Courtesy: amwhatieat

Tuesday, August 4, 2020

Caramel Custard - Instant pot Version


Ingredients (Serves  8 – 10):
         Milk                            --   2 cups 
         Eggs                            --   3
         Sugar                           --   ½ - ¾ cup (As to taste) 
         Sugar to Caramelize    --   1½ tbsp 
         Vanilla Essence            --   ½ tsp 


Preparation of caramel custard pudding:

Prepare a 6 inch cake tin and keep aside. 

You can also use multiple ramekins and stack them in the instant pot. I have tried stacking 2 6 inch cake tins in the instant pot and it worked perfect.
 
For the caramel, add the sugar with 2 tbsp water in a small sauce pan and heat on medium flame. Let it boil. Once it starts to bubble, reduce the flame to medium low. This need a little patience. Stir continuously to have an even colour. Let it caramelize. Once it turns brown, look for the colour you are looking for and switch off the flame as soon as it is achieved. It just needs seconds to burn the caramel.

Quickly and carefully pour the caramel into the pan and swirl it to make sure you have an even coating on the bottom. Let it cool.

Never ever try to touch or lick the caramel at any stage before it is completely cool.

Beat the eggs well until it is smooth. Add the milk, sugar and vanilla essence. I use either a hand mixer or just blend all together in a blender until well combined.  

Pour the mixture onto the cooled caramel. Cover if with a foil to avoid any moisture getting into the custard.


Add 1 cup water into the instant pot. Keep the filled cake tin on the steaming rack and carefully keep this in the pot.

Close the lid and with the venting knob on sealing position, pressure cook at high pressure for 15 minutes. Let the pressure release naturally, approximately another 10-15 minutes. 

Once done remove the foil cover and gently dab any moisture on the custard with a kitchen towel.  At this stage the center might look a little wiggly, but it will set well as it cools.
 
Let it cool to room temperature and refrigerate until they are chill. 

Use a butter knife or back of the spoon to separate the custard from the sides of the pan and turn it upside down onto your serving dish. Slice and enjoy !!!


Sunday, July 19, 2020

Mango Cheese Cake - Instant Pot version


Ingredients:
Crust:  
     Graham cracker/Vanilla biscuits       --   9-10 rectangle sheet / 15 vanilla biscuits
     Dark brown sugar                                --   1 tbsp
     Unsalted butter                                     --   2½ tbsp
Cheesecake filling: 
     Cream cheese softened                       --   1 lb; 2 bars of Philadelphia cream cheese
     White sugar                                           --   ½ cup
     Mango pulp                                            --   ½ cup
     All purpose flour                                  --   2 tsp
     Eggs                                                        --   2 large whole and 1 large yolk


Preparation of the cheese cake:


Grind the crackers/vanilla biscuits into a fine powder. Add the brown sugar. Add the melted(and cooled) butter to the same and mix it well with the hand. Mixing the butter in the blender doesn't work for me as it gets stuck. But you can give a try.
           
Prepare a 7 inch springform pan. Slightly butter the bottom and the edges, evenly. Line the bottom with a sheet of parchment paper. 
Spread the mixture on the bottom of the pan evenly and press down hard, using the back of the spoon. Freeze for 20 - 25 minutes.      
Prepare the instant pot and the cheese cake filling while the base freezes.  
Add the softened cream cheese, sugar, flour and mango pulp to the mixer. I used a stand mixer. Mix until the ingredients are just combined well, approximately less than a minute on medium speed. Make sure not to over mix. 
Add the eggs one at a time and mix for 10-15 seconds, before adding the next one. Again make sure not to over mix. 
It should be a thick flowing consistency and all ingredients well combined with no lumps. 
Pour this to the prepared pan. Tap the pan gently on the counter to burst any air bubbles.
            Add few drops of mango pulp on the top and gently poke it to decorate - purely optional.
Cover the pan with a paper towel and then use a foil on top of the paper towel and crimp the sides of the foil onto the pan. This helps to make sure that the paper towel is held in place. The paper towel helps to absorb any moisture while the cake is being cooked. - My paper towel slightly got drooped down and you can see the imprint on the cake.
To prepare the instant pot - Add one cup water to the instant pot and insert the steamer into it.   
Carefully place the covered pan on the steamer. Close the pot with the lid and set the pressure release to sealing. Select the pressure cook option and cook for 37 minutes on high pressure.  
Let the pressure release naturally. Once done, open the lid, carefully pull out the pan and remove the paper towel / foil cover. Carefully use another paper towel to dab any excess moisture. Let it cool on the counter for another 1 hour. The center might look a bit wiggly and thats perfectly alright. It gets set as the cake cools. 
To remove the cake from the pan, use a butter knife or a cake spatula to run through the edges of the cake. Carefully remove the lock and lift it off. 
Refrigerate for 6-8 hours. It is easy to remove the bottom, once it is cooled. Slide a cake knife carefully under the parchment paper and slide it onto a cake pan. 
          Slice and Enjoy !!!


Recipe Courtesy: Ministry of Curry