Wednesday, March 31, 2010

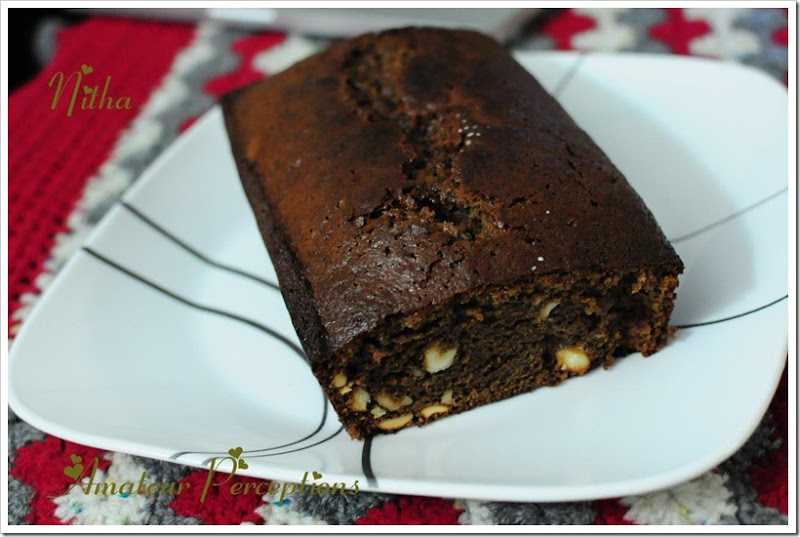
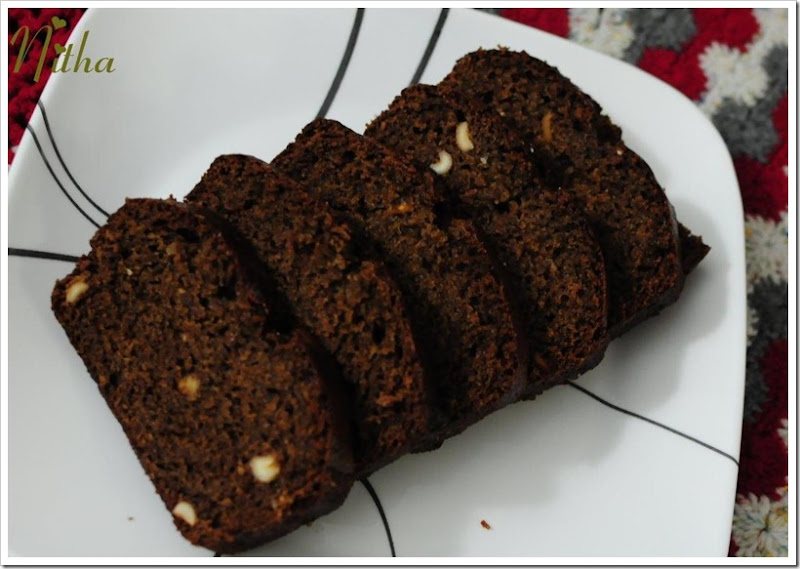
Chocolate Banana Cake

After my appointment with the dentist was my hubby’s. He went there after a grand breakfast. I knew he would not be able to eat anything hard to bite. “Something soft to eat” would bring into mind the picture of a cake or bread. I had few ripe bananas left over and thought of using that in the cake. So went with my aunt’s recipe of banana cake. To make it healthier I replaced butter with canola oil and maida with wheat. And made some other alterations to make a chocolate chip cake J which came out really good…
Chocolate Banana Cake 16
Ingredients:
Wheat flour                          --    1 cup (All purpose flour can be used instead)
Baking powder                    --    1 tsp
Baking soda                         --    1 tsp
Ripe Banana                        --    2 medium size
Eggs                                      --    1 big egg (this can be replaced by another banana)
Canola oil                             --    ½ cup (Unsalted Butter can be used instead)
Powdered Sugar                --    ¾ cup
Vanilla Essence                   --    1 tsp
Cocoa powder/syrup        --    3 tbsp
Chocolate chips                  --    ¼ cup
Chopped Nuts                    --    ¼ cup (optional)
Chocolate Banana Cake 15
Preparation of Cake:
Mix the flour, baking powder and baking soda. Sift the mix 4 -5 times. This helps to mix the baking powder and baking soda thoroughly in the flour. Keep it aside.
Take the oil in a vessel. Add the powdered sugar to it and beat well.
Smash the bananas with a fork or use the mixer to smash it well. Add egg to it and mix well. (If not using egg, smash all 3 bananas).
Pour this mixture in to the oil-sugar mix. Add the vanilla essence. Mix well. Keep on mixing and add the flour spoon by spoon. Make sure that the flour is mixed well in the mixture before adding the next set.
Add chocolate syrup and mix well.If the mixture is very thick, add milk to make it the required consistency.Add the chocolate chips and mix it.
Spray oil in the pan and dust it with the flour. Pour the batter into the floured pan.
Bake in a pre-heated oven at 180 degree Celsius (300 F) for 70 to 80 minutes. Check if a tooth pick comes out neat and if yes let it cool.
Chocolate Banana Cake 17
Recipe Courtesy:  Chithra Aunty

Tuesday, March 30, 2010

A visit to the dentist


Visiting the dentist... It's a nightmare for almost everyone. They'll "softly" inspect our tooth and gums with the variety of instruments they have. Not sure if they are taught to forget the sharpness of the instrumentJ. We would take care of our teeth when we think about the pain that follows. We’ll definitely think about the cost too, especially in US. But even after taking care, I had to visit the dentist here. Hereditary... We can't get rid of things which our parents or grandparents pass through the genes.

I started feeling sensitivity on my teeth while brushing; it was slightly painful and was bleeding too. So decided to take an appointment for the yearly free check up; but got one for a day three weeks later. I was really surprised... why so long?? Then my hubby explained to me. Here, in US, any treatment is either urgent (we have urgent cares) or late (taking an appointment). Since mine was not that urgent, as the pain was tolerable for three weeks, we chose the second one.

On the day of the appointment, we went to the clinic on time. The receptionist gave me some forms to fill in - my bio data and their declarations and disclaimers. I was a bit tensed reading through the declarations I am gonna accept, it was something like any treatment can or cannot be successful...  But thinking logically they were fine. Not all treatment would be success on everyone, however good and efficient the doctor is. And the doctor would not want any one to sue her.

Once I was ready with the forms, a nurse came and took me inside. She started taking photographs of my teeth. yeah.. X-rays of course. I was again surprised. Back in India the doctor would prescribe an x-ray only if there was some serious injury on that tooth. So I asked her, why she was doing that even before the doctor examined me. She explained me that the doctor would look at the pictures first and then into our mouth. Any internal damage to our tooth will not be visible through naked eyes. Yeah.. she was right.. though this would cost more, this is the right way.

Once the nurse took the pics of all my teeth, the doctor came in. She was so cute. No wonder guys visit the clinic happily J J  She showed me the pics. It looked like a number of octopus kids standing for an assembly.... But they were actually my teeth with the roots. Then she explained me about each tooth. Other than the one which pained, there were two other teeth with some damage. She asked me if I wanted her to treat that as well. Believe me.. When you see the zoomed pics of the cavities inside, you would never say a NO. Finally she prescribed 3 cavity fillings and a deep cleaning. She asked me to take 2 appointments. On the first day, they would clean one side, ie either left or right, and also do the fillings on that side. The other side another day. Hearing that I was again like why 2 days??? Why not finish in one day?? That's how doctors do in India. Though I had that in mind, I did not ask it loud. But I got the answer on the next day of appointment.

After a long confusion with my medical insurance, I got my next appointment. I reached there an hour earlier ie by 9 am. Of course it was too early for me and I had to limit my breakfast to a cup of milk. A nurse took me in and gave anesthesia on every tooth on the right side. Within minutes, I was totally numb on that side. The doctor came in and started with their work. The nurse inserted a mouth cushion in my mouth so that I would not close my mouth until they are done. I could see the doctor and the nurse inserting a number of instruments into my mouth, but couldn't feel anything. They finished their work in the next 90 minutes and rinsed my mouth with an antiseptic mouth washing gel. That tasted so bitter that I wanted to rinse my mouth with water. I was not allowed to spit or rinse. They had a machine sucking all the water from my mouth. I had to strain a lot to speak out, but still I kept on talking on my way back home. I somehow wanted to get rid of the bitter taste from my mouth. As soon as I reached home, I went to the washroom to rinse my mouth...it was like a leaking tap.. water oozing out through the right side of my mouth. My right side was still numb and I had no control of that side. I then realized that I was not able drink water or eat anything. What would I do?? I was hungry too.. L Some how managed to drink half a glass of juice. And I spilt the other half..  Helpless... I went to sleep.. It took around another 4 -5 hours for me to get rid of the numbness. I thought I was happy. But when the numbness left, pain came in. Oh my god... the former was better. So much pain for one side. How would it feel if it was for both the sides together. I got the answer for the question...

The other side is waiting for the next appointment.... One more day of half numbness. At least will remember and find time to have a proper breakfast next timeJ J


Monday, March 29, 2010

Chilly Chicken


We usually get the frozen chicken, which I do not prefer as I feel like I do not get the essence of chicken in the curry. So though it’s a bit far away from our place, we went to the Halal market and got fresh chicken. But one whole chicken (around 1.5 kg) would serve 2 of us a minimum of 5 to 6 meals. So I decided to try out varieties for each meal. It was a Saturday. I got the recipe for Chilly Chicken from my mother in the morning and then prepared the list of ingredients that I need to buy. As usual after long hours of planning, we went out by 7 pm. Reached Walmart and searched the whole center for Green chilly Sauce, but in vain. L  That’s available only in Indian/Chinese Store. They close out by 8 pm and we were already late L  But we were ready with our fried rice and the chilly chicken was half done. We once again went around the Asian-Hispanic food bay and gladly found an alternative there – Red chilly sauce with garlic. J J So I made some alterations in my mom’s recipe and prepared the dish, though later I could find a video in YouTube, where a chef uses Red chilly sauce for chilly chicken. 

IMG_3573


Ingredients:

Chicken                                  --    1 lb
Corn Flour                             --    2 - 3 tbsp
Cubed Onions                        --    ½ cup
Capsicum                               --    ½ of a medium sized one
Chopped garlic                     --    1 tbsp
Garlic Paste                          --    1 tbsp
Ginger Paste                         --    1 tbsp
Red chillies                            --    4 -5
Soya Sauce                           --    1 tbsp
Chilly Sauce                          --    2-3 tbsp (If green chilly sauce) or
                                                      1 -2 tbsp (If red chilly sauce – its too hot)
Tomato Ketchup                 --    1-2 tbsp
Pepper                                   --    1-2 tbsp
Spring Onion                        --    2 – 3 stem
Vinegar (optional)               --    1 tbsp
Oil                                           --    2 tbsp
Sugar                                     --   a pinch
Salt                                         --   to taste

Preparation of Chilly Chicken:

Marinate the chicken pieces with 2 tbsp of corn flour (if you wish to have a thick coating, add 2 – 3 tbsp of maida too), salt, egg and 1 tbsp of pepper.  Keep it for 15 minutes. 


Deep fry the chicken till they are golden brown. Keep aside.


Heat oil in another pan and add the red chillies cut into pieces, ginger paste, chopped garlic, diced onions, diced capsicum, chopped spring onions and left over pepper powder in the mentioned order. Let it cook for 2- 3 minutes. Now add soya sauce, chilly sauce,tomato sauce, sugar and salt to it. Add required amount of water to the mix and bring it to boil. Add vinegar for flavor.  Add fried chicken kept aside and mix well. Let the gravy thicken up to the required consistency.

IMG_3580


Recipe Courtesy: Amma

Friday, March 26, 2010

Cauliflower Thoran

At my home in Calicut, we will definitely have a minimum of three side dishes for lunch. They are any gravy kind vegetable curry, fish curry and a thoran or mezhukkupuratti, which would be like half fried vegetables. At times we have more additions like pappadam, fish fry etc. I think that the easiest among them would be thoran or mezhukkupuratti, with just the effort of chopping the vegetables. I usually do not go for all the three items for lunch, mostly the easiest one would be out of my menu. One of the vegetables that my hubby’s taste buds have approved is cauliflower and so I ended up in trying out cauliflower thoran.


 Ingredients:
Cauliflower                             --    250 gm
Shallots                                    --    2 small ones
Turmeric powder                  --   ¼ tsp
Cumin seeds                          --   ¼ tsp
Mustard seeds                      --    ½ tsp
Red chillies                            --    2
Curry Leaves                          --   few
Shredded coconut                 --   ¼ cup
Oil                                           --   2 tbsp
Salt                                          --   to taste
Preparation of Thoran:
Chop the cauliflower into required size. Mix the turmeric powder, cumin seeds and shredded coconut into chopped cauliflower. You can even grind these to a course paste and then mix it with cauliflower. Since I prepare a very small amount, grinding the coconut is quite not easy and I just thoroughly knead it before mixing. Also add finely chopped shallots, curry leaves, pepper powder and salt to the mixture and mix well.
Heat the oil in a pan. Add the mustard seeds and let it splutter. Add the red chillies broken into small pieces. Then add the cauliflower mix and sauté for 2 min.  Close the pan and let it cook for another 5 -6 min. Open the lid and sauté it at every 1 minute interval and make sure that it doesn’t burn.
Non-vegetarians: You can also add an egg to this which will give a special flavor, especially for pure non-vegetarians like my dearie.
When the cauliflower is half cooked, add an egg into the pan and scramble well. Let it cook together for the rest of the time.

Recipe Courtesy: Amma

Baked Fish - Whole Tilapia


Whenever we go to the fish market here, we get confused with the names of the fish. We try to relate it with the ones we get there in Kerala. Also search for the Malayalam translations for each of them, though we hardly find any.
Once when I talked to my aunt about the tilapia fillets, she told that its the same what we call 'Pilappi' in our place. She gave me the idea of getting a full tilapia and baking it. My hubby welcomed that idea whole heartedly, with one condition that he needs one full fish J
Last Monday was one with heavy Monday blues. We woke up very late and then my hubby decided for a WFH (Work from Home à that’s what OSCs call a lazy day J J ). With minimal cooking for breakfast (toasted bread with nutella spread) and lunch (kanji and pickle), I too sat in front of the TV watching the adventures of Drake in  “Uncharted 2 – Among the thieves”. By evening we were saturated with the PS3, so went out for grocery shopping. Suddenly it striked....... The idea to have a whole Tilapia for dinner. We went to Chinese market, where we get fresh fish, and got it straight away.


Ingredients:
Fish (Tilapia)                    --   1 whole, cleaned well
Turmeric Powder            --    ½ tsp
Chilly Powder                   --   2 tbsp
Coriander Powder           --    ½ tsp
Ginger                               --    1 ½ inch piece
Garlic                                 --    2 medium size cloves
Shallots                              --    2 small
Curry leaves                     --    few
Coriander leaves              --    few
Fennel seeds                     --    1 tsp
Oil                                       --    1 tsp
Salt                                     --    to taste


Preparation:


              Clean the fish and slightly cut the flesh up to the bones.


Grind all the ingredients to a fine paste. Add water if required. Marinate the fish with the above marinade and keep it for 15 – 20 minutes.


Preheat the oven to 400 F.  Broil the fish for 30 min turning to the other side after 15 min. Spray oil if required.


Recipe Courtesy: Myself

Thursday, March 25, 2010

Just a trial -- For a change


After the last post, I felt I need to try something new for the breakfast. Again something easy and primarily needs to be approved by my hubby. So came with the idea of Rava idly. Waiting for the weekend, I decided to try it out. I had some rice idly batter in my fridge as a back-up, in case my rava idly doesn’t come out good. But fortunately, it came out well and was approved by the taste buds of my better half.

Rava Idly:


Ingredients:

Sooji/Rava                                       --  2 cups
Vegetables (carrot, beans etc)        --  as required
Green chillies                                  --  4 or 5
Ginger                                            --   1 inch piece
Curry leaves                                   --   few
Curd                                               --  1 cup
Baking soda                                   --  a pinch
Mustard seeds                                --  1 tsp
Urad dal                                        --  1 tsp
Asafoetida                                     --  ¼ tsp
Salt                                                --  to taste

Preparation of the idly:

Heat the oil in a pan. Add the mustard seeds and let crackle. Add urad dal and asafoetida. Add salt, chopped green chillies, ginger, and curry leaves. Then add rava and stir in low/medium flame until it turns light brown in colour. Add the chopped vegetables if required.

Place the mixture in a big bowl and add the baking soda and curd to the mixture. Mix well. This should be same as the idly batter consistency. Keep it aside for 30 minutes. If the mixture gets thickened, add more water or curd.

Pour the batter into idly maker and steam for 5 to 7 minutes in an idly cooker. 

Recipe Courtesy: Internet

Monday, March 22, 2010

Weekday Routine


Today not in a mood to do or write about my cooking adventures. So, thought of writing something else. My sweet home here in US and how I pass time here.


As mentioned in the other post, my day starts around 8.30 am. Get fresh in 15 minutes and enter my workstation. Be ready with the breakfast and the lunch box in another 30 minutes. My hubby leaves to office by 9.30 am. Then.. am in my own world… Me and vonage for the next 1 or 2 hours; now getting extended to 3 hours after the DST is ON J.  Gets ready for the gym…. I would be the only person to be in the gym when the sun is right above our headJ. Stating, being lonely as the reason (though it’s the laziness),  I just do a workout of 20 minutes maximum. I know that this doesn’t help to put down, still gives me a satisfaction that I went there…he..he …

Again getting back to my workstation after bath, I spend the first half an hour to decide on what to cook. Then get ready with my dinner items, next day’s lunch box special and the side dish for the breakfast.

Once done, its entertainment time. Ohh.. I didn’t mention about my friends here. I have two mallu friends in the apartment complex. One of them stays just opposite to our apartment and the other just above. Entertainment time is either movie time or the 3 idiots meeting time. The meeting agenda of course is the different varieties of dishes each of us had tried and sharing them so that others tests out for their better half’s taste buds. We never miss out the opportunity to criticize our better halves.

We disperse when one of our hubby is back, usually that would be my dear who comes early. After T, we spend our time with some movie or TV with programs like in NatGeo, Bizzare Foods on Travel channel, House Hunt etc or with my hubby’s favorite PS3 until dinner. It’s again work time for my darling after the dinner, waiting for the offshore project mates…. We would see our clock striking 12 midnight, 1 am , 2 am……………………

When I started my house-wife role, I thought I would get bored with the same routine; but actually I ve kind a started loving this. I ve learned to be more lazy J  Achievement??? Ohh Nooo…  Hopefully, I ll get out of this lazy life very soon and do something more creative and valuable … 

Thursday, March 18, 2010

Easy Breakfast


In almost all health magazines and internet sites, we read – Breakfast is the most vital meal of a day. My grandmother used to tell - Have breakfast like a King, Lunch like a Prince and Dinner like a Pauper.
Very few onsite coordinators in IT industry have proper breakfast. Sorry friends…. No hard feelings… I don’t have any experience, but that’s something I’ve heard from my hubby as well as my friends. With the late night offshore calls, the day usually begins only by 8.30 am or later. And in the hurry to reach office by a decent time, the easy one to skip is the breakfast.
Though I don't have late night offshore calls or have to rush to office, my day also starts late morning and ends late night. Even if I keep saying that am giving a company to my hubby for night outs, the truth is I find my friends online at that time. That’s when I collect all the updates from my friends in India.
So now coming back to our topic – breakfast; Easy breakfast should be easy to prepare and easy to eat. The first thing that comes to our mind when we think of an easy breakfast is either Bread-Butter-Jam or Corn Flakes. But as I prefer more of the authentic Kerala dishes than the English breakfast items; my weekday menu includes idly, dosa and vellappam. These can be made on the fly with the ready made batter in the fridge. Of course puttu is easy to prepare, but my hubby don’t find it easy to eat J.  So, that would come under our dinner menu J
With all these.... does it sound like we have a grand breakfast during weekends? If yes, sorry friends…. Weekends are even worse… We directly jump onto lunch or we can call it as Br-unch on weekends.
Now let me just tell you how I prepare these…


Idly / Dosa:

Ingredients:
Raw Rice                               --   2 cups
Urad dhal                              --   1 cup
Cooked Rice                          --   ½ cup
Methi seeds                           --    2 tsp
Salt                                         --    to taste
Preparation of the batter:
Wash and Soak the rice and urad dhal with methi seeds separately for about 6 hrs. Grind the urad dal with methi seeds until it becomes fine. Then grind the rice to slightly rough consistency. Add a little salt and mix both the batter together. During winter season, preheat the oven to 215F and switch off and then place the batter and leave it over night for fermentation.
Prepare idlis by steaming it for 10-15 minutes in an idly cooker. For dosas, add water to the batter to make it thinner and then prepare them on the pan.


Vellappam:


Vellappam 1


Ingredients:
Raw Rice                               --   2 cups
Cooked boiled Rice              --   ½ cup
Shredded Coconut (optional)     --   ½ cup
Yeast                                      --    ½ tsp
Sugar                                     --   2 tbsp
Salt                                         --    to taste
Preparation of the batter:
Soak raw rice in water for almost 2-3 hours. Put the soaked raw rice, cooked boiled rice, shredded coconut, water and sugar in the mixer and grind, till smooth. Pour this in a large bowl and add yeast and mix well. Leave this for around 4 - 5 hours or till the mixture rises. Add salt to this mixture and mix well.
Heat a tawa or nonstick vellappam chatty and make yummy vellappams.
The same batter can be used for Vattayappam or Kallappam (that’s how we call it at home).  Just before preparing, check for the sweetness and add sugar if required. Grease a flat pan or idly mould with little oil and pour in the fermented batter. Top it with cashews and raisins. If you wish to have it with curry, you can reduce the amount of sugar and add required amount of salt.
Steam it for 15 min in a medium heat or until it is done. Allow it to cool in the pan for 15 min and gently take it out.
I prepare the batter for all these once a week and keep it in fridge once it is fermented. So that makes an easy breakfast.

Recipe Courtesy: Amma

Wednesday, March 17, 2010

Should I start this?? What to start with?? How to start??


Everyone who is working (especially the likes of me from IT industry) would always long for a vacation. But trust me it’s too tough to stay at home, since we are used to offices. After 5 years in IT industry and recently married, am now playing the role of a house wife. Thanks to visa restriction in US, I can’t work L

I thought of utilizing this time to brush up my interests in cooking and crafting. Being a temporary resident in US, I don’t do much of crafting. I might not be able to carry the stuffs back home. But cooking has become my passion. Of course I shouldn't forget to thank Vonage and my husband's generosity to get me a connection, with the help of which I get all the recipes from my mother & mother-in-law.

I note down each recipe in a document whenever I try it, as I could refer that the next time.  My hubby got to see that one day and he persuaded me to jot down those in a blog. I don’t think I would limit my blog with recipes. So after a great confusion in providing a name, here it is.... "Amateur perceptions".

The recipes are from my day-to-day menu. My hubby prefers more of variety than having the same dish served multiple times. This makes me try differently, of course concentrating more on non-veg items. I plan to post all the recipes which I have tried out. I do not have the pics for few of them as I had tried them before getting the idea of blogging. I shall upload the pics when I try them next time.

I find this interesting at this point, but not sure how long I would stick on this…. May be until I find out something more interesting.

Neways.. here comes my first post.... wishing myself 'All the very best' to continue blogging.... And hope all my friends wish me the same :) :)